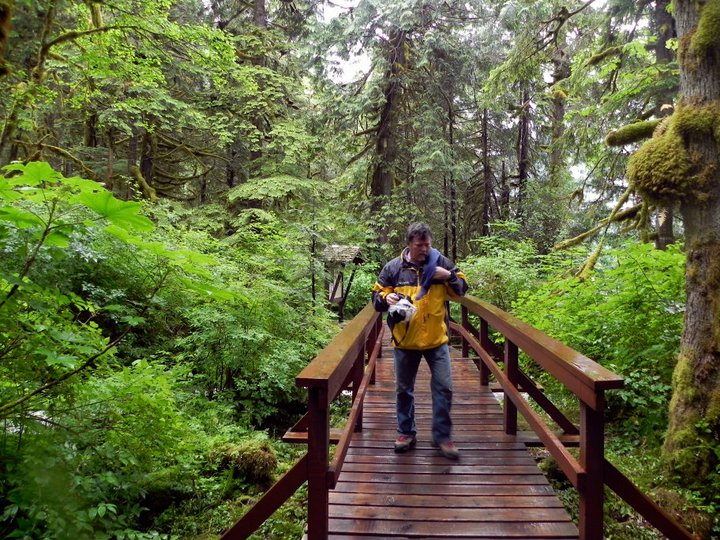
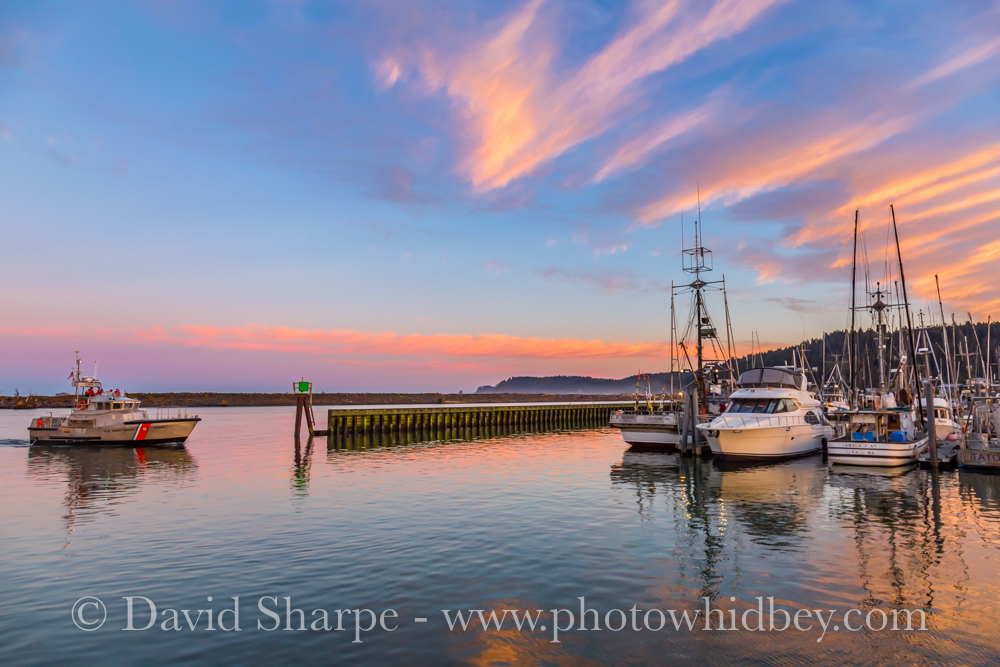
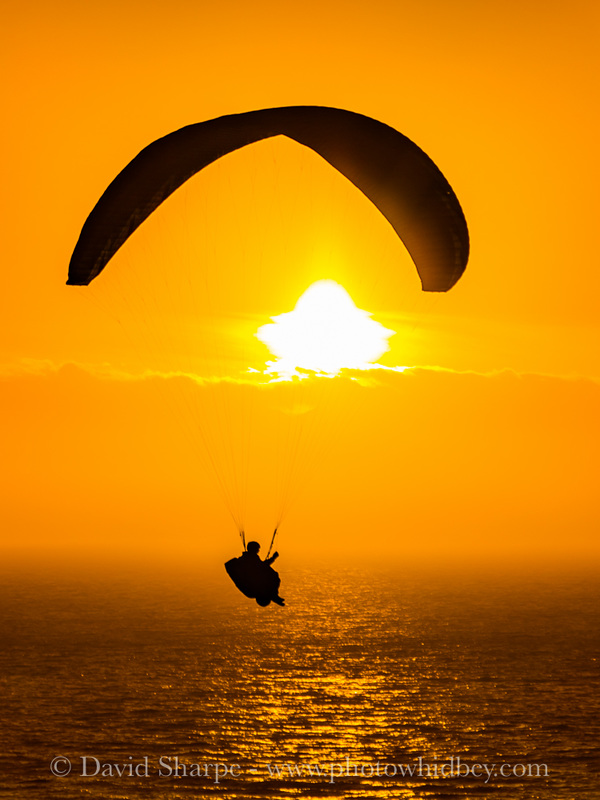
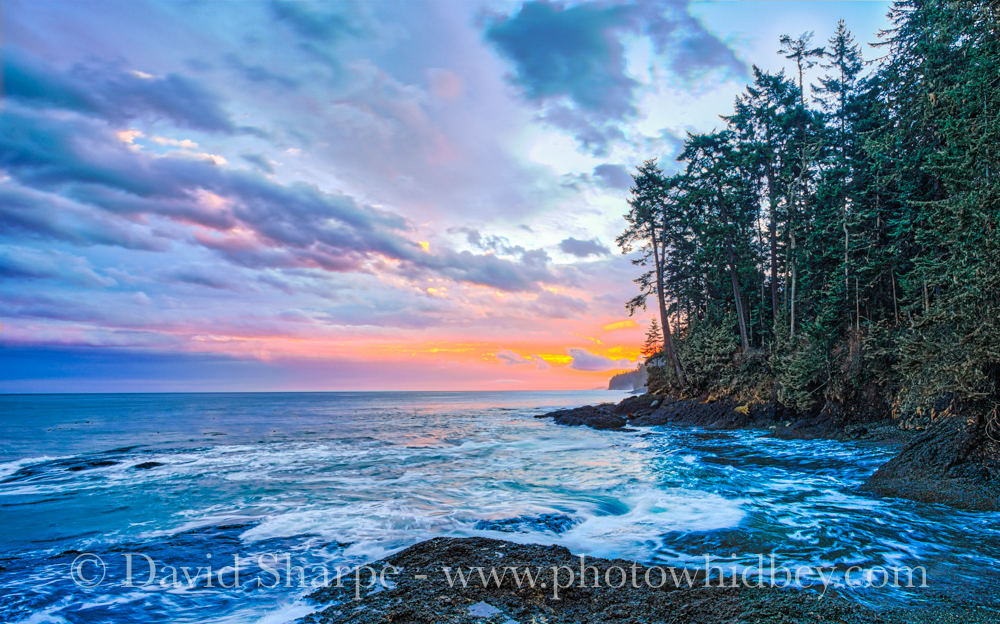
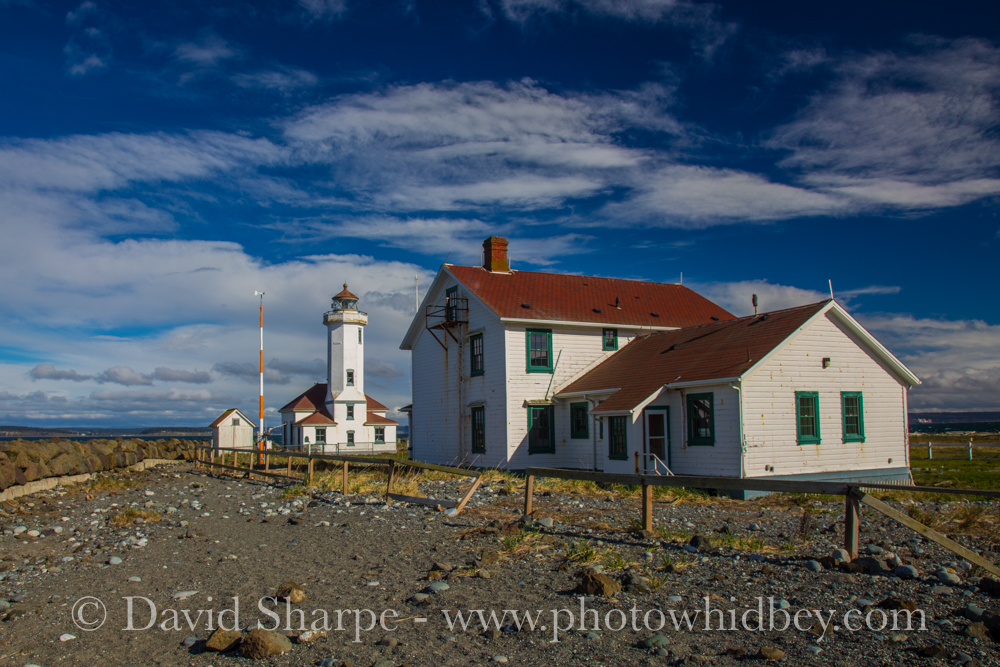
 An Interview with Landscape and Fine Art Photographer David Sharpe 1. What equipment to do you use? What camera? I use a beat-up Canon 6D DSLR camera and a collection of Canon L-series lenses. I firmly believe that good photos can be made with any camera - it’s not about the equipment. The photographer chooses what to include in the frame and how to compose the image, as well as selecting exposure settings to capture the scene in an artistic way. My camera has been dropped, tossed in the back seat of my car, and generally abused. It’s missing the mode indicator (fortunately I can still change modes) and the on/off switch is permanently “on”, but it still works fine. Money is better spent on buying good lenses and gaining knowledge than it is on constantly having the latest, greatest camera. 2. Technical Advice? That’s a tough question to answer - technical advice should be targeted for each individual photographer, depending on their needs. I suppose the best advice I can give is to find a mentor - someone you admire who is willing to teach and share their experiences. We do this in the medical field, as well as many other professions. In The Arcanum we use a Master/Apprentice relationship in which students work in small groups with a mentor who guides their learning as they work through set challenges. I began as an Apprentice, and am now a Master in The Arcanum, with my own students literally all over the world. I frequently meet with these students one-to-one via Google Hangouts to review their images and offer personal advice and suggestions for improvement. It’s a real thrill to see the measurable progress these students make as time goes by. At the same time, I have my own mentors in the Arcanum that I often share ideas and struggles with. 3. Creative Advice? I suppose my best creative advice is to SLOW DOWN and really think about what you’re doing in the field. One of the challenges I give my students is called the “Sniper Challenge” - one shot, one kill (OK, I learned everything I know about snipers from that Tom Beringer movie.) The student has to describe in advance an image they want to make and tell me what they’re going to photograph and when, as well as their anticipated camera settings and lens choices. Then they are required to go make that image, but they only get to take one photo, then have to pack up and walk away. The final step is to share that image with me and tell me what worked and what didn’t - and what they’d do differently if they had another chance. Many of us (myself included) get so wrapped up in the scene before them that they start snapping photo after photo in hopes of getting something good. 4. Post Processing - Favorite techniques? Many people mistakenly believe that post processing - or “photoshopping” a photograph is cheating, but in fact it is absolutely a recognized part of the process of creating an image. The great Ansel Adams - perhaps the most famous landscape photographer ever - used dodging and burning techniques to alter his images in the darkroom. Today the darkroom has been replaced by a computer, and we can really tweak our images to create just the look we want. As far as a single favorite technique, I guess I’d have to say it’s removing halos using Photoshop’s clone tool set on darken mode - that sounds confusing, but I made a video which shows how to do this. It’s a quick and easy technique that I’ve been using for some time. You can watch it here: https://youtu.be/EnwHZmX_35I 5. Post Processing - Software used? I’m a big fan of Adobe Lightroom. I do 90% or more of my editing in Lightroom, exporting to Photoshop or other applications when needed for specific tasks. I find that Lightroom is incredibly powerful and allows me to do almost anything I need - and each new upgrade adds features that make it even more powerful. Adobe offers Lightroom and Photoshop subscriptions bundled together for around $10 per month, with free upgrades to the latest version whenever new features are added. I was skeptical about the subscription plan at first, but I’ve found it much less expensive than buying both of these software applications along with paying for periodic upgrades. 6. Technical challenges? Perhaps the biggest issue I struggle with is creating natural-looking blends of multiple exposures using luminosity masks. I love this technique, because it can create amazing images by blending several shots into a final image that looks more like what my brain remembers seeing on scene. I’ve followed Sean Bagshaw’s work with this technique, but still feel I haven’t fully mastered it as much as I’d like to. This is a technique that I’m actively working to develop. 7. Creative Challenges? Perhaps the biggest challenge I face creatively is finding a unique image to make. My days of hiking out into the wilderness are long past, and I now travel in an RV (I love a hot shower and a comfortable bed after a day of photographing). This means that many of the places I photograph are easily accessible to everyone else with a camera - so in order to make my images stand out I need to find a unique angle or lighting situation. The amusing thing is that I’m often followed by other photographers who want to take advantage of the unique view I’ve discovered. Just yesterday I was in the Skagit daffodil fields making images of the sunrise over the brilliant yellow fields. There were plenty of other photographers nearby making the same image, but when I walked back to my car I noticed that the Olympic Mountains behind us were just being illuminated by the morning sun. Not a single photographer had noticed this yet, and there was a wonderful daffodil field in the foreground, making this a unique perspective. I set up and started composing my shot, only to be joined by 6 other photographers who had noticed me facing the other way across the street and hurried over to take advantage of my “discovery”. 8. Artistic signature that conveys your style? When I first picked up a camera, I avoided including anything man-made in my images, preferring the undiluted beauty of nature. Over the years though, my style has evolved and now I actively look for people or signs of human presence to include in my photographs. I think this gives the viewer something to identify with in the image, and helps to draw them in. Even other photographers are fair game for inclusion in my images. The key is that I rarely have the person interacting with me - these are not portrait sessions. Rather, a silhouetted figure watching the sun set really captures the feeling of “being there” that I want to convey to the viewers. A path winding through a prairie, a dock on a placid lake, even piles of trash found in an otherwise pristine forest all evoke a reaction from viewers. 9. Favorite Subject? I love to photograph anything I can find in the outdoor setting. Living here on Whidbey Island I find that I spend a lot of time making seascape images - capturing the rugged landscape and moving water excites me. Like many landscape photographers, I also look for interesting lighting that is usually found at the beginning and end of the day. In fact, my Arcanum teaching group is called The House of the Rising (and Setting) Sun. 10. Favorite Location? There are so many amazing locations everywhere I’ve travelled that it can be tough to pin this down to a single spot. I love the local scenes of Central Whidbey, and I regularly photograph these as a means of practicing my craft - a necessary part of improving as an artist. If pressed to name a single location, I guess I’d have to say the outer Olympic Coast - La Push, Second Beach, Ruby Beach and Kalaloch all offer amazing locations that are easily accessible. Readers interested in knowing more about Dave Sharpe are invited to contact him at [email protected], or to check out his website at www.photowhidbey.com If you’d like more info about the Arcanum or would like to join Dave’s teaching cohort, contact him directly. David is a resident of Whidbey Island but travels throughout the Pacific Northwest (and beyond when possible) making images and capturing the light anywhere he can. Dave also works part-time as an ER nurse, but his true passion is photography. Fortunately he is able to travel often with his wife in a 24’ RV, exploring all the great places our region has to offer. Dave’s images are available both online and at Coupeville Coffee and Bistro where he displays his work. But his real love is teaching others how to make stronger photographs. He is a Master in The Arcanum, an online academy offering mentoring and guidance for photographers all over the world, founded by the well known Trey Ratcliffe and others. (www.thearcanum.com)
0 Comments
 We Are More Than Just Our Five Senses.
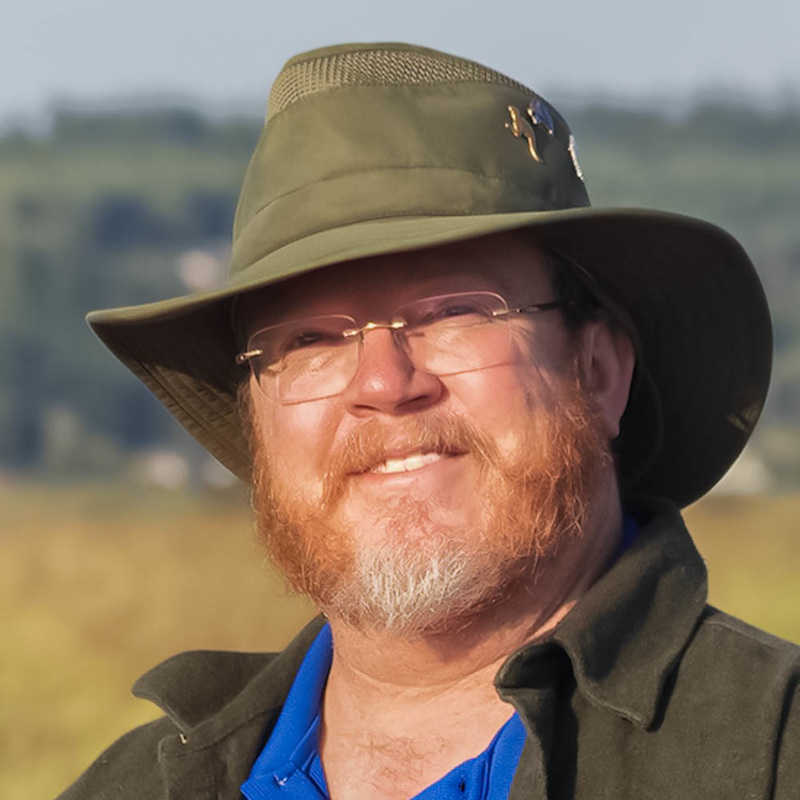
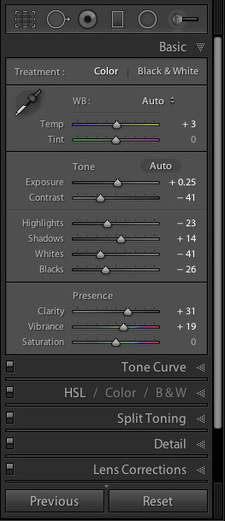
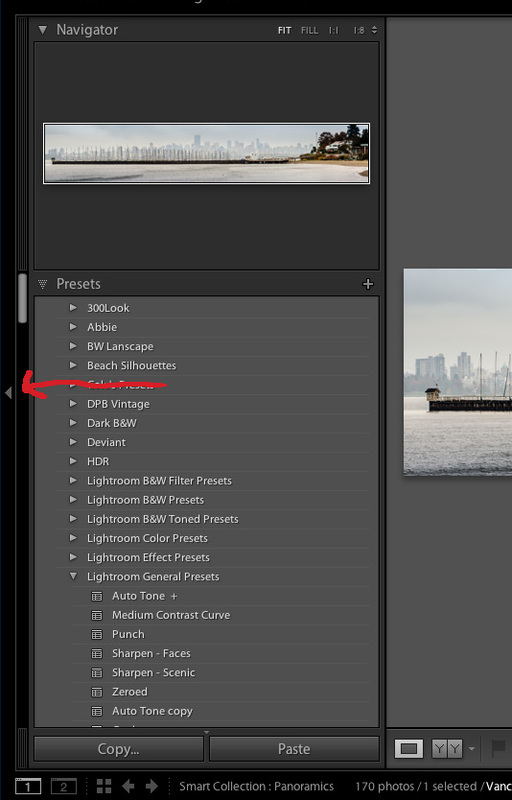
We all know about our basic five senses, the ones we use everyday… Seeing, Smelling, Hearing, Tasting & Touchy Touchy ones. But, did you know we actually have three others? I discovered these while bouncing around one of the Science blogs I follow. Yes, my mind wanders all over the place. Here they are: 1. Interoception: Your internal organs have senses too — They are detecting, or sensing, internal regulation responses, such as respiration, hunger, heart rate. They let us know if we’re hungry or thirsty and that the ‘ole ticker is happily pumping away… And more importantly; When we have to go to the bathroom! Otherwise known as “digestive elimination.” 2. Vestibular: Also known as the “Master Sense.” This one is connected to our inner ear and brain, processing, or sensing, information required for controlling balance and eye movement. It is telling us things like where we are, how fast we’re moving, where too look… And again, very important; If we’re falling. 3. Proprioception: Also known as the muscle and joint sense. This one tells us how to take or grasp, sense the relative position of neighboring parts of the body and strength being employed in movement, all via spatial orientation arising from stimuli within the body itself. They help in telling us how to get into a coat or how to get up the stairs… Or, play a musical instrument? I’m thinking it may also be known as “Muscle Memory.” But we may also may have something I made up and call #4 — Your Artistic Sense The sense of Artistic Creativity Instinct which tells you when something “just feels right.” A painter knows, feels, or senses when and where to add something to their painting. As a photographer while I move my camera around looking through the viewfinder I know, feel, or sense when the scene tells me “shoot right here.” Do you use your Artistic Sense? Do you recognize it? What does your Artistic Sense tell you? 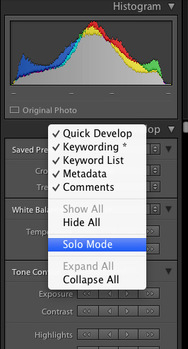 Have you had the issue with Lightroom where it is hard to find the control tab you’re looking for as you scroll up and down a panel? Even when you know where everything is. Welcome to Solo Mode. Lightroom will automatically collapse all tabs inside a panel, showing only the one you are using at that time. Click on another tab, it will open as the current tab closes. In Solo Mode here is how to save time and frustration, while allowing you to see more of the options available at any one time. And still find the control you were looking for. To activate Solo Mode right-click (Ctrl-click) on any dark grey area near the name of any tab, in either the left or right side panels and click on Solo Mode in the pop-up list that appears. You will notice all but one of the tabs are now open, making it quick and easy to switch between them. To open up more of the screen for your image, auto-hide one or all four panels around Lightroom. See that little triangle on the outer edge? Click on it to hide that panel. This allows more screen space to see your image. To temporarily see that panel again, just hover your mouse over the triangle, access what you need, then as you move your mouse away, the panel will auto-hide again. Want it back all the time? Just click on that little triangle again.
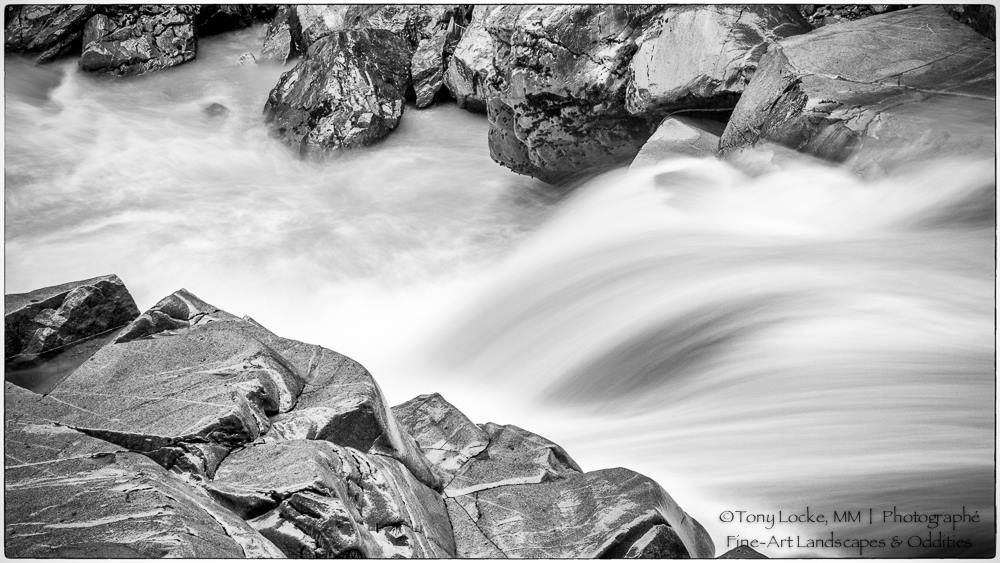
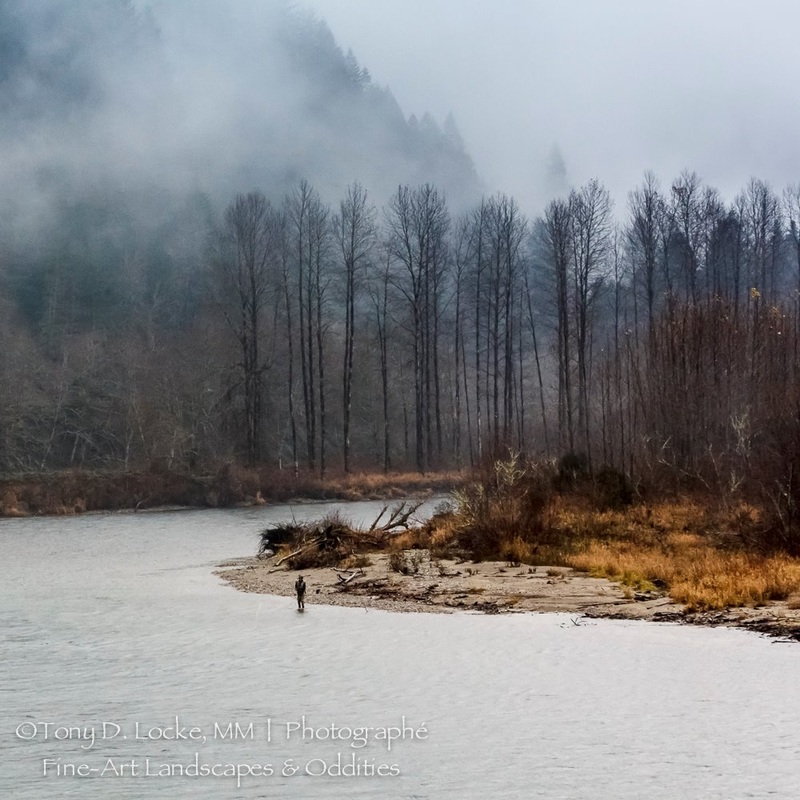
When working on a panoramic I like to have a full screen. I can now see more with just the left panel hidden. I also like to have my lower Film Strip and top Header panel hidden, as I don’t really need them open when I am in the Develop Module. Click on the little triangles at the top and bottom. Look how much work surface I now have in the final image. Another fun trick--Click on the Tab key and both side panels will hide, click again and they come back. This has been known to happen by accident, so if your side panels are gone, push the Tab key. With a Shift + Tab, all four panels will hide, giving you a full screen for just the image or images when in Grid Mode. That is it for today, stay tuned for more Lightroom and Photography tips to come. 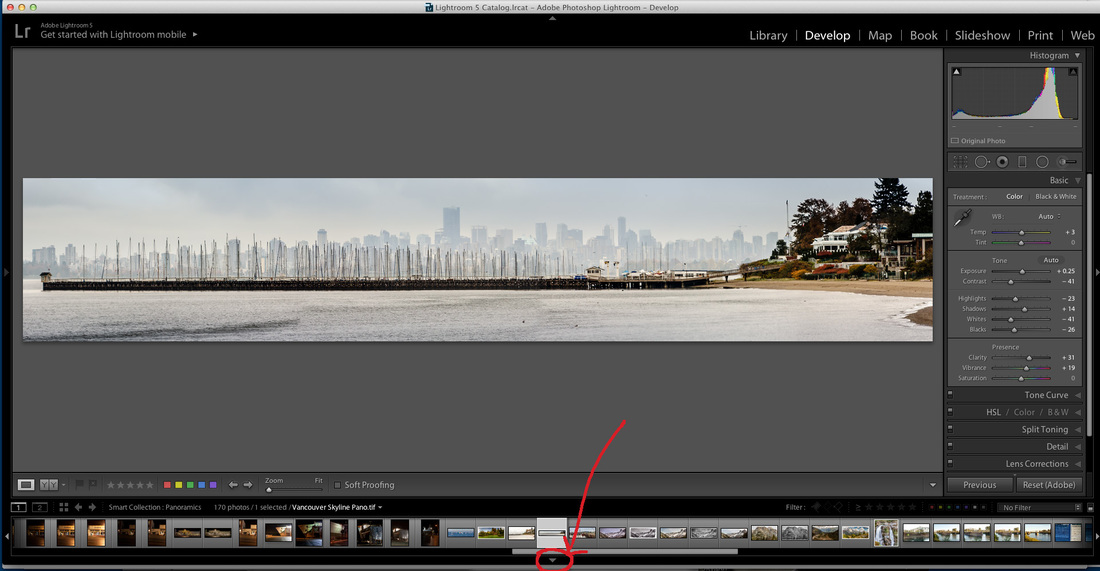 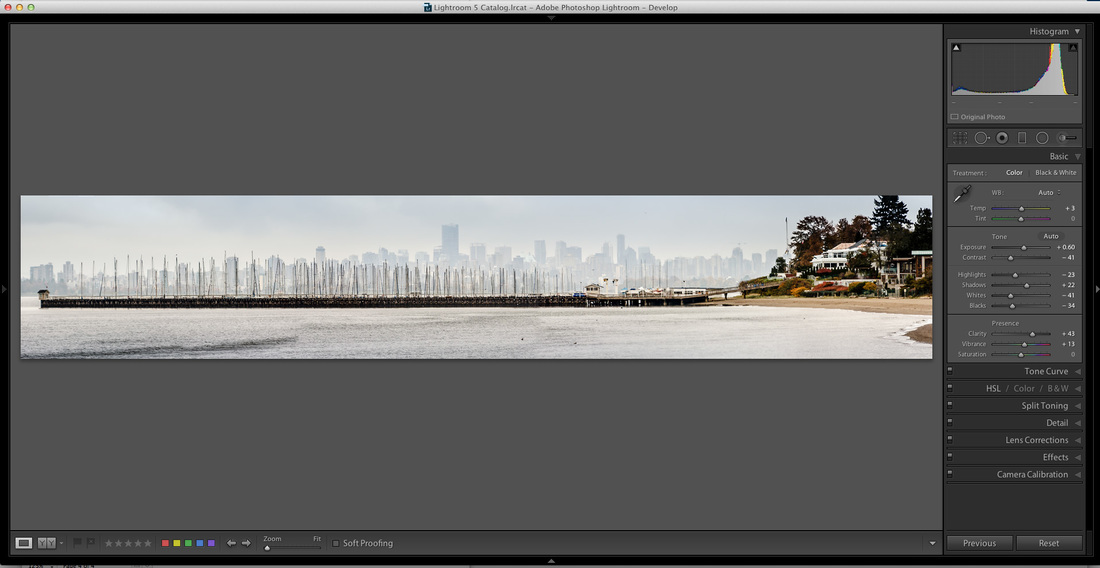 Art implies control of reality, for reality itself possesses no sense of the aesthetic. Photography becomes an art when certain controls are applied. - Ansel Adams  Image by Tony Locke Image by Tony Locke Recently I overheard a landscape photographer say, “I don’t consider myself an artist, I consider myself a craftsman. Mother Nature provided the art, she was the real artist.” As an example he continued, “just because you have a pot, doesn’t necessarily make you a chef.” True. Also true in photography, just because someone has a camera, doesn’t necessarily mean they are a photographer, or an artist. Nor does expensive gear and/or technical skills necessarily make one an artist, they still need to have a vision. Vision doesn’t necessarily stop after the photograph was shot. Some say post-processing or image manipulation is not photography. But post-processing or image manipulation is another tool in the creation of art. Look at Ansel Adams, he created stunning works of art in the darkroom. Art comes from the vision of the photographer; how they saw a subject, how the image was created, how they express themselves. This is what makes them an artist. Most photography workshops focus on the technical skills not the vision. We are going to feature Fine Art Photographers; their vision, their skills, and their technical requirements. We will also focus on the artist, after all the artist is the most important element in Fine Art Photography. Fine Art photography is about expressing oneself as an artist. It is an accumulation of skills, experience, processing, and most importantly, a vision. Art is not only about beauty; art is about ideas, emotion, deep feelings, and about interpreting all these through the prism of the vision of the artist. Read More about Fine Art Photography
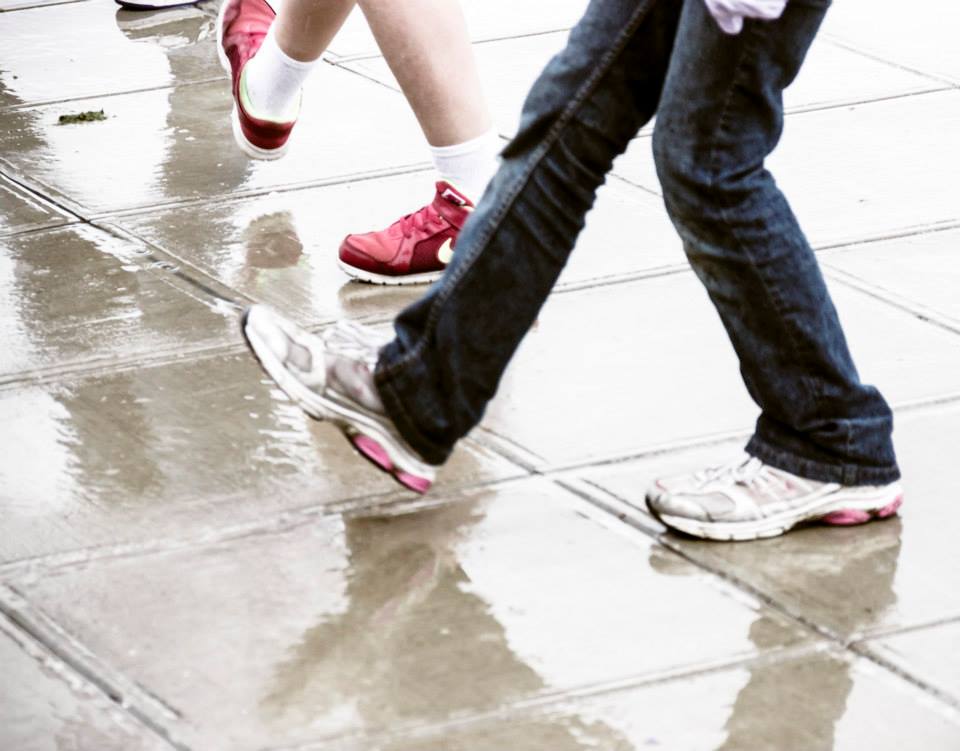
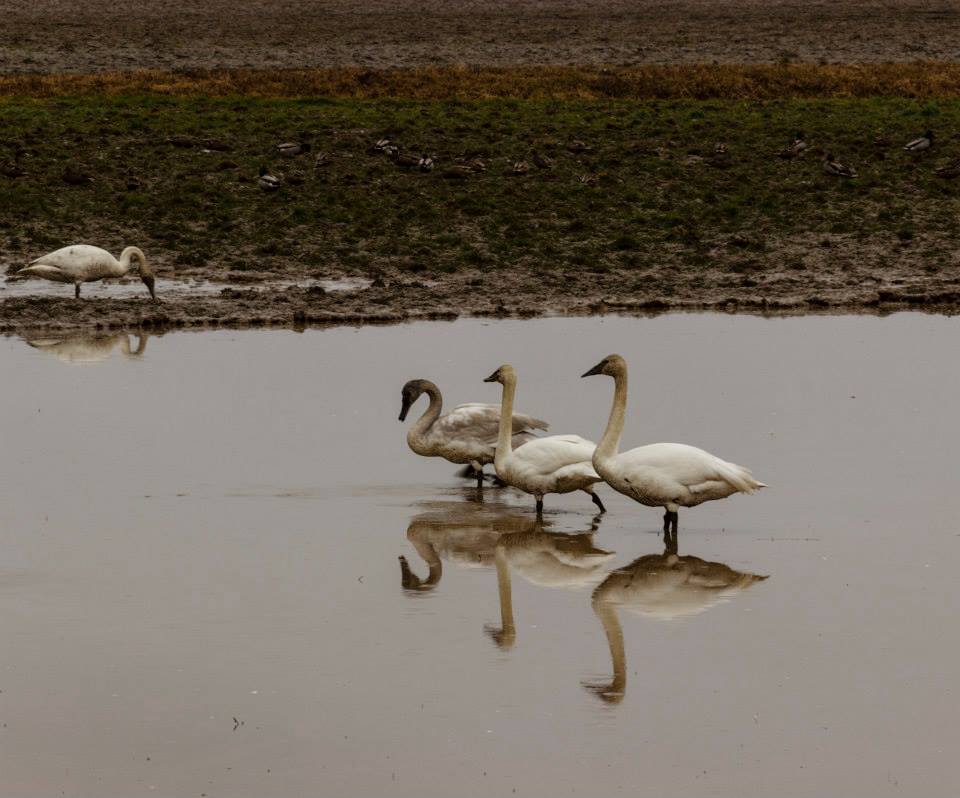
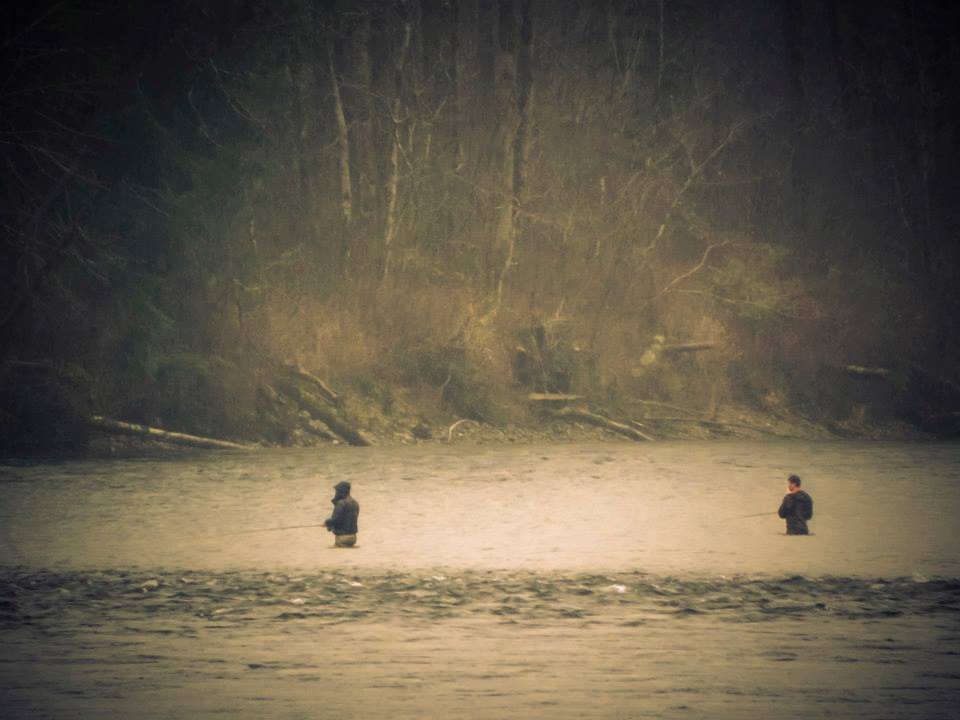
 Rain—it messes up your freshly washed car. Puts a damper on picnics or weddings. A game may even be postponed because of it. But when you live in the Pacific NW rain is just a fact of life. If we waited until it quit raining to go outside, we’d be cooped up inside for months. What do we do? We learn to live with it. We put on our rain gear, then we head out to enjoy all of the fresh air and greenery that the rain provides. The simple rain gear idea goes for your camera too. Rainfall provides a great opportunity for creativity ideas; reflections, active waterfalls, moisture, texture, drops and more. Shooting In The Rain—Where Do You Start Shooting? If It Is Raining Really Hard — Look for shelter. Locate an awning to stand under while you shoot. Parking garages provide nice shelter. Any overhang will do, you just need something to help keep the rain off of you and your gear. Sometimes, shooting from inside your car may be your only option. Just park in a good location, then simply roll down a window—point, shoot. You may find the need to switch to a longer focal length lens, which provides a different perspective in your composition. Some Ideas To Inspire You When Shooting In The Raining Photographing in the rain starts with an open mind. Rain makes for an interesting subject of itself, and it provides some interesting phenomenons to the world around you. For example, once familiar landscapes are transformed into something new to in which to capture. For Street Shooters—look for a new range of emotions from the people caught in the rain; disgruntled commuters standing at the bus stop, people working in the rain, umbrellas, and delighted kids jumping in puddles. You don’t have to be a kid to enjoy jumping in puddles! Go ahead, slip on your boots and be a kid, you know you want too! When it’s raining, nothing goes untouched, or unaltered. Open your eyes to all of the new photographic possibilities in front of you. The most obvious are the amazing reflections in puddles of water. They can be smooth as glass or provide texture with the ripples. Get low to the ground and those same reflections take on a whole new perspective. The subject in the reflection becomes the whole composition. As I mentioned before, landscapes are quickly transformed by rain. Colors are more saturated. Plant life is now adorned with interesting droplets of water. Poke around foliage to find interesting droplet patterns. Animals are fun, pets and in the wild. Puppies playing in the rain, cats trying to protect themselves, or wild animals who seem to not notice the wet weather. Make sure you keep your distance, a big, happy, wet dog shaking off, might be laughable but it may not be good for your camera! Buildings and unique architecture, with water flowing from roofs, drains and backlit streaked windows—provide a unique shot. Street lights at the Blue Hour are even better in the rain. Then there is the rain itself. Which Brings Us To — How to Capture Rain Surprisingly, rain can be tricky to capture. Here’s a few quick tips… Lens Choices/Focal length The same effects of compression and magnifying due to different focal lengths still applies. You can use any focal length you want to capture rain, it is all dependent on the backdrop. With the rain becoming your focal point, you will have new challenges to play with in your compositions. Aperture Settings Since I am predominately a landscape photographer, I am in Aperture Priority most of the time. Your style of photography may dictate your preference. Try to change things up from how you normally shoot — capture the rainfall itself as part of the environment. You may discover a way to add something extra to your images. Unless you are going for a great backlit bokeh, you may want to refrain from settings, such as, f2-f4, normally used for shallow depth of field. The magical sweet spot of f8, still makes for a great starting point. This will keep both the rain and its nearby scene in relative focus, while allowing for faster shutter speeds to freeze the action. Shutter Speed Again, the general rules of Shutter speed still apply, but now the motion is the rain. What may surprise you, rain can sometimes be moving faster than you think. Use shutter speeds which will change the effects of capturing rain movement. Experiment, there is no right setting when it comes to capturing the motion of the rain. Freeze the rain for some unique shots with a faster shutter speed, or use slower settings to create streaks or blurs. Luckily, with digital and instant feedback, you can quickly readjust as needed. ISO With camera’s stupendous ISO capacities today, ISO is no longer as much of an issue. Still, to keep noise down, I try to have my ISO as low as possible, and when possible, shoot with a tripod. To have one less thing to concentrate, I leave it set to Auto ISO, with a maximum of 1600. This allows me to concentrate on composition and the effects I can produce with Shutter and Aperture settings. In Auto ISO, the camera will work out what is needed for the existing lighting conditions. If you want full control, make sure to keep track of your ISO also. Flash Experiment with your flash. A little can go a long ways. With an external flash, start at a lower power to produce a little bit of a nice “pop” to the raindrops. Don’t blow-out the highlights. Move your external flash to a different angle as the camera, this will produce some unique effects. Which leads us to our next tip… The Fun Of Backlighting And Bokeh Raindrops will become more clearly defined, as well as more interesting, when they are backlit with interesting patterns. Try to find a suitable light and something with interesting patterns and color, then shoot into it. Streetlights, lighted signs, lighted windows of buildings, holiday lights, traffic, or the sun peeking through trees or clouds make for interesting images. The trick is to find “that perfect shooting angle.” It is best to shoot with the light directly behind, but not so direct of an angle, as you will run into the possibility of causing the raindrops to appear overexposed. Slight angles also produce some unique effects, while opening up your aperture will add in some dreamy bokeh. Experiment, Experiment!! Next time it rains, don’t let it get you down. Grab your camera and enjoy the downpour. |
AuthorPhotography and photographers... A look at both. Blame it on the light. Archives
June 2017
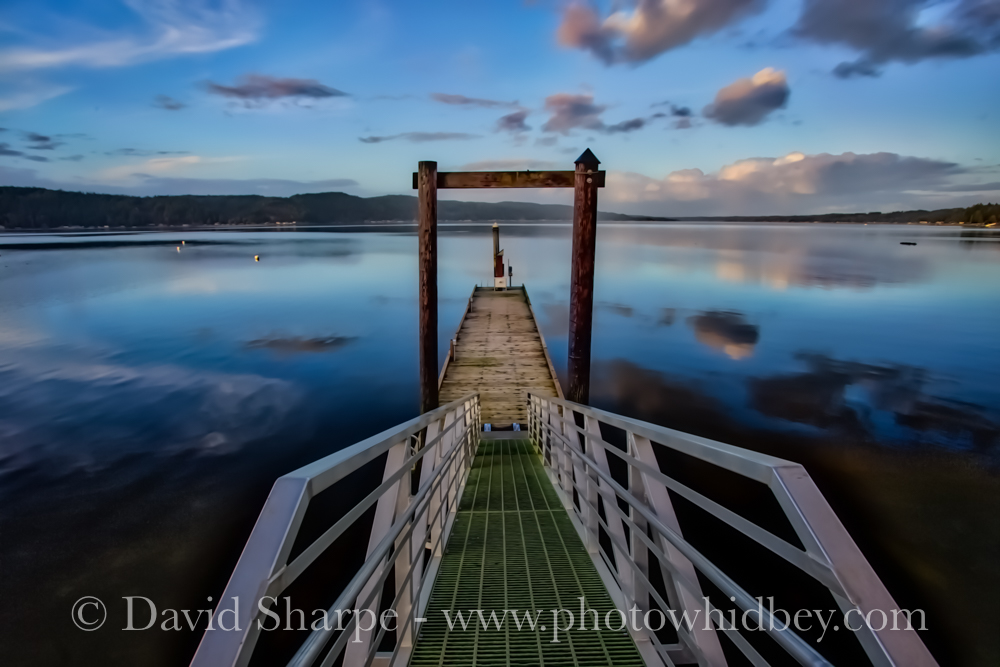
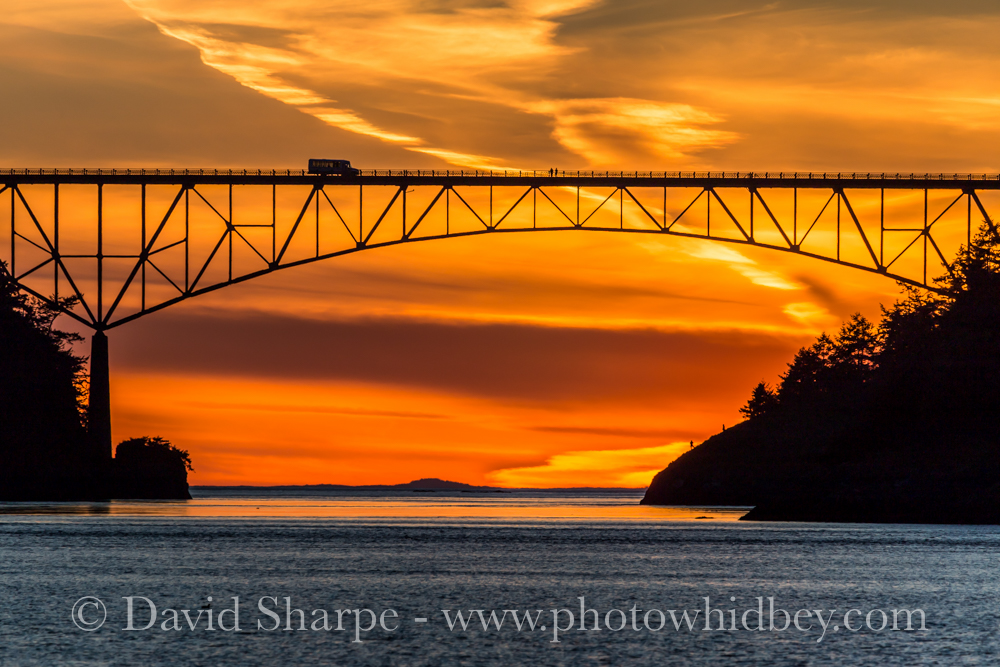
Categories
All
|


 RSS Feed