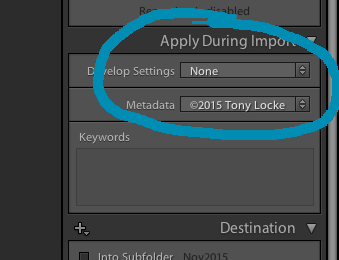
 When you Import images into Lightroom you can add Metadata to the images, most importantly, you can add your Copyright information, along with contact info. Just another layer of protection of your images. Open Lightroom, while in the Library Module, click on the Import button on the bottom left. About midway down the right panel, you will see Apply During Import, if you don't see the option fields, click on the triangle to the right to open that tab, it is under this tab where you can apply Develop Presets, Metadata and Keywords to images as they are imported. The first drop-down is Develop Settings. Normally you can chose any of your existing Presets, but I don’t recommend doing it at this point of the import, otherwise all the images imported will have that Preset applied—Good or Bad. For this blog will will leave it set to None. My Apply During Import still shows ©2015 Tony Locke in the Metadata drop-down, we are going to change it to ©2016 for the New Year. 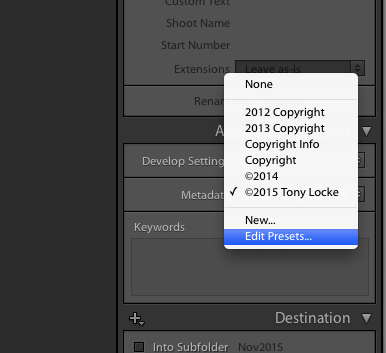 Click on the Metadata drop-down and chose Edit Presets. The Metadata Window will now show. In here, you can add as much or as little information as you would like. I keep mine minimalistic, with just the main important information. Add whatever additional information you would like. 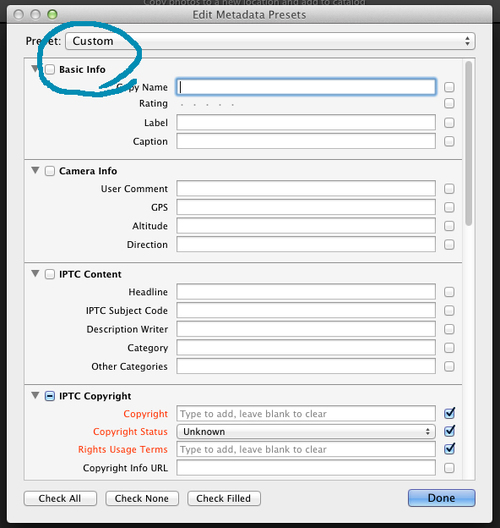 When this window first opens, you will see a Preset name Custom. Here are the Metadata fields that can be filled in. The red fields are Lightroom’s minimum recommended fields to add, so we will start there. You can click on the triangles to the left of each tab to close sections if you like. 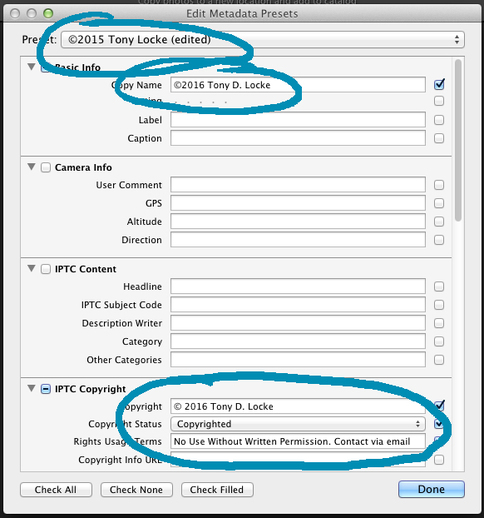 At the very top, under Basic Info - Copy Name, add ©2016 YOUR NAME. To make the Copyright Symbol PC - On Windows based computers you can add the copyright symbol with a few simple keystrokes. Press the "alt" key and hold it down while typing "0169" on the keyboard to create the © symbol. ALT0169 MAC - On an Apple computer, it’s simply “Option-G” to produce the © symbol In the tab IPTC Copyright, add more specific information, as shown in this example of what can be used. 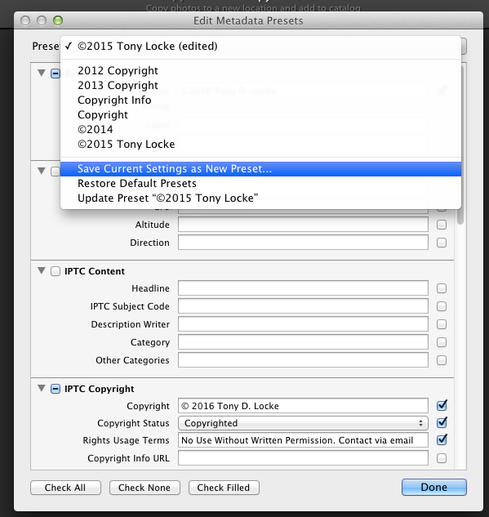 Go to the top Preset drop-down and choose Save Current Settings As New Preset…And give it a name you will remember… 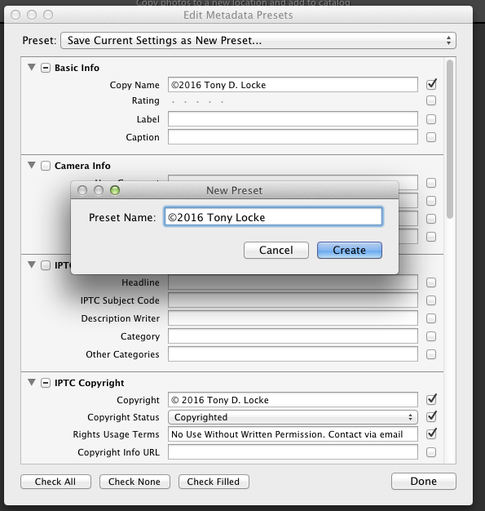 Here is where you can name the preset. Usually you just put the copyright symbol, year, and name. 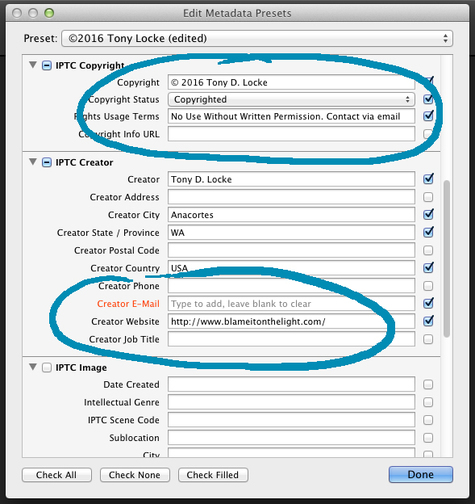 Scroll down to fill in the IPTC Creator tab. I usually add name, city, state and country, along with my email address (which is removed here) and my website. This information will make it easy for someone to contact you should they have questions about your image. 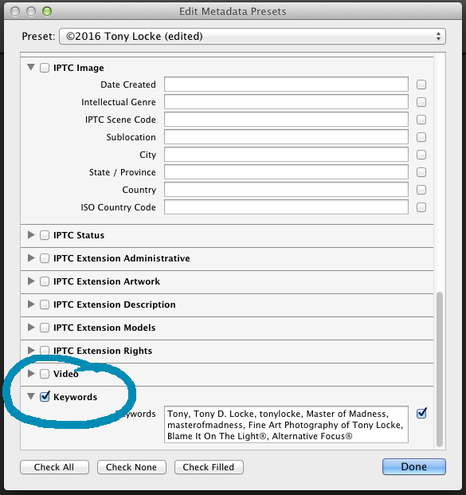 Down at the bottom you will find the Keywords tab. Here you can enter any Keywords you would like to have added to every single image you import to Lightroom. I have my name in all variations it may be found or searched by along with my fine art brand names; Blame It On The Light & Alternative Focus, as those are searchable Keywords for my images also. This will save you the time of entering those Keywords into the Keywords field in all future imports. 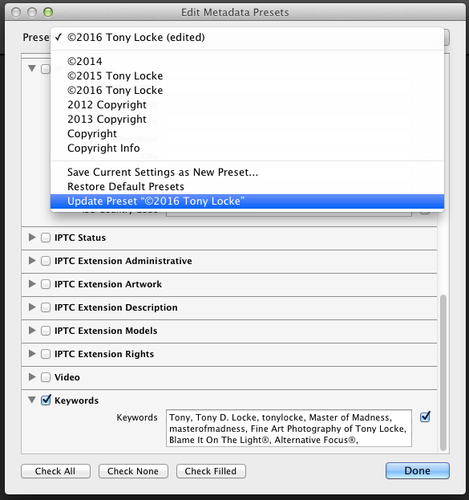 You will notice at the top of the window, the Preset name now shows the word (edited), this is to warn you that you have made changes to the preset since naming it. Click on it and choose Update Preset ©Your Name, then click on Done at the bottom. 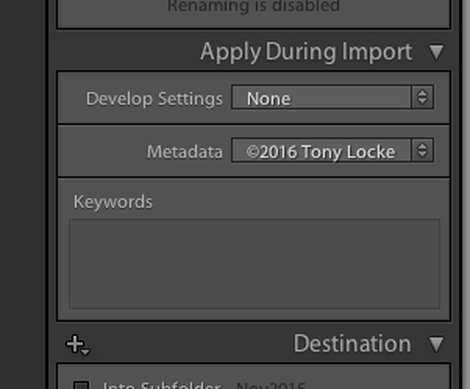 In the import window’s Apply During Import tab, choose your new Metadata Preset, which will then be applied to all photos you import in 2016.
0 Comments
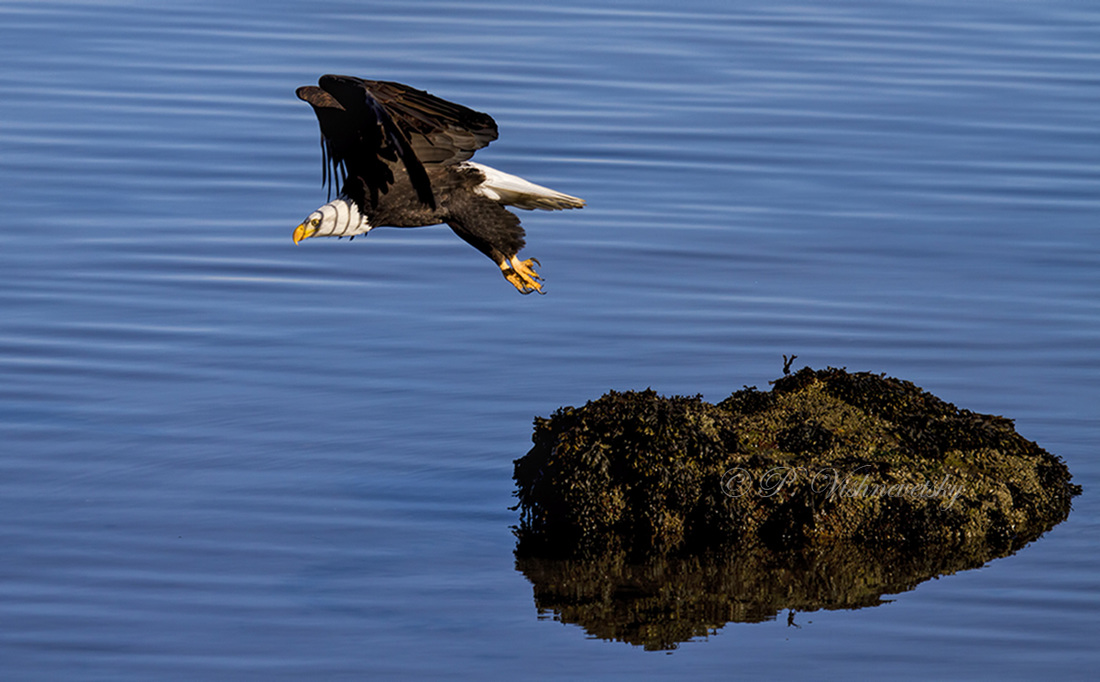
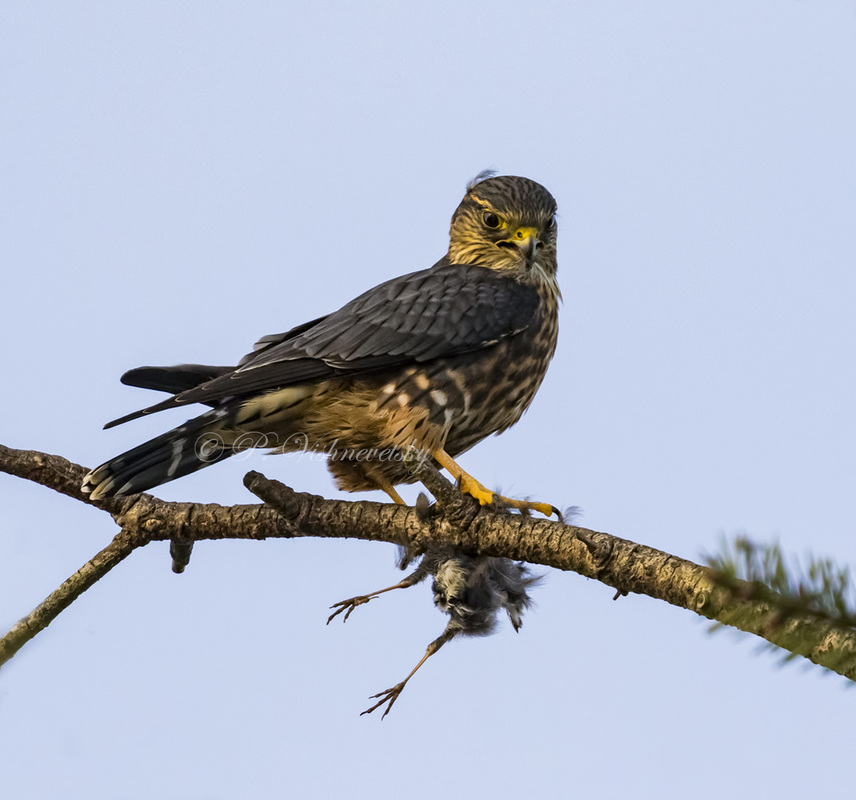
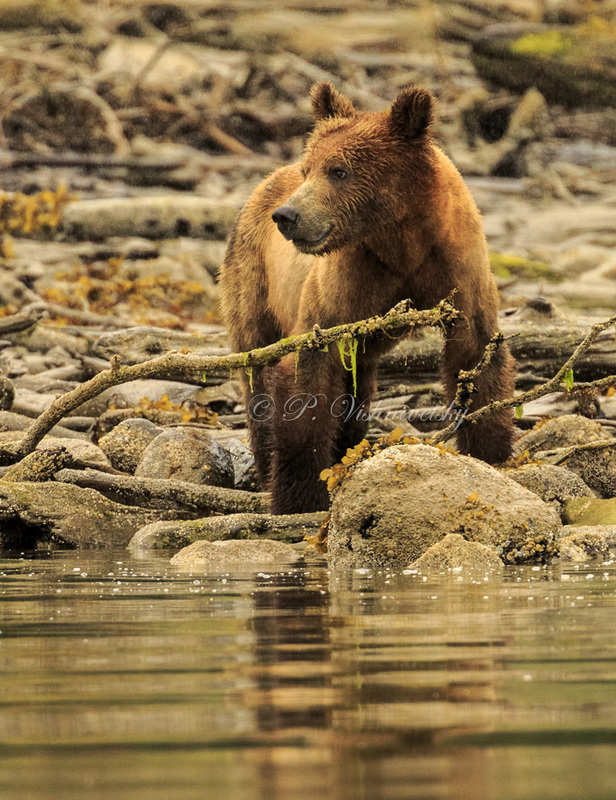
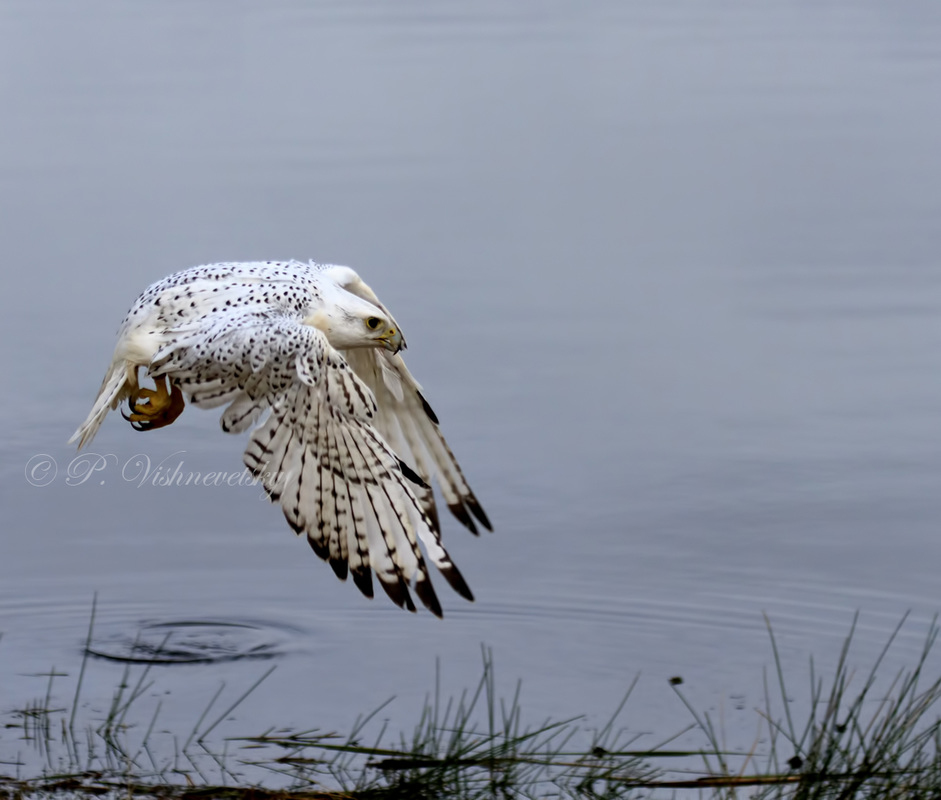
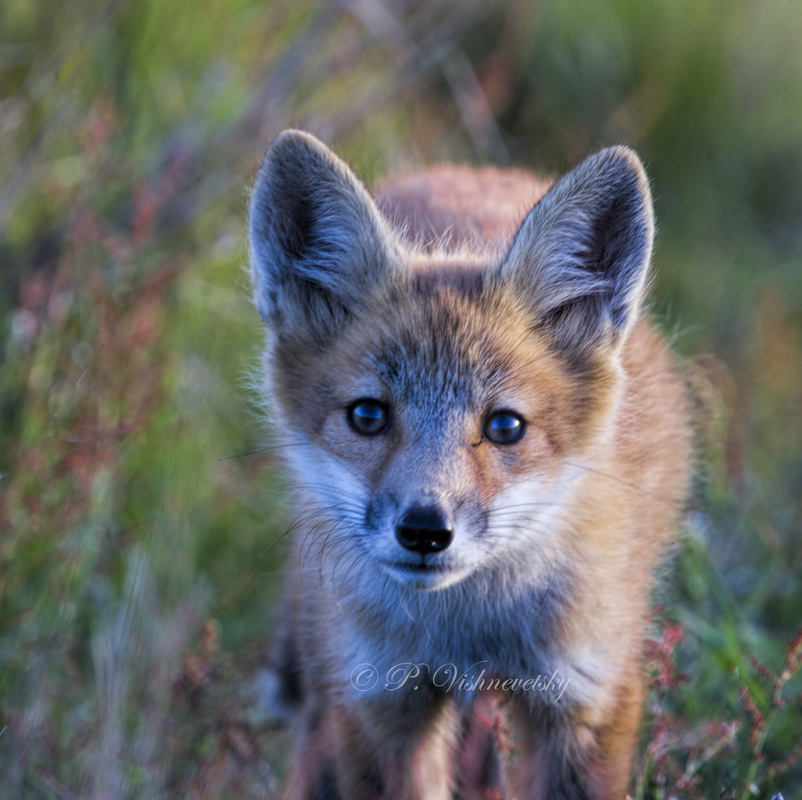
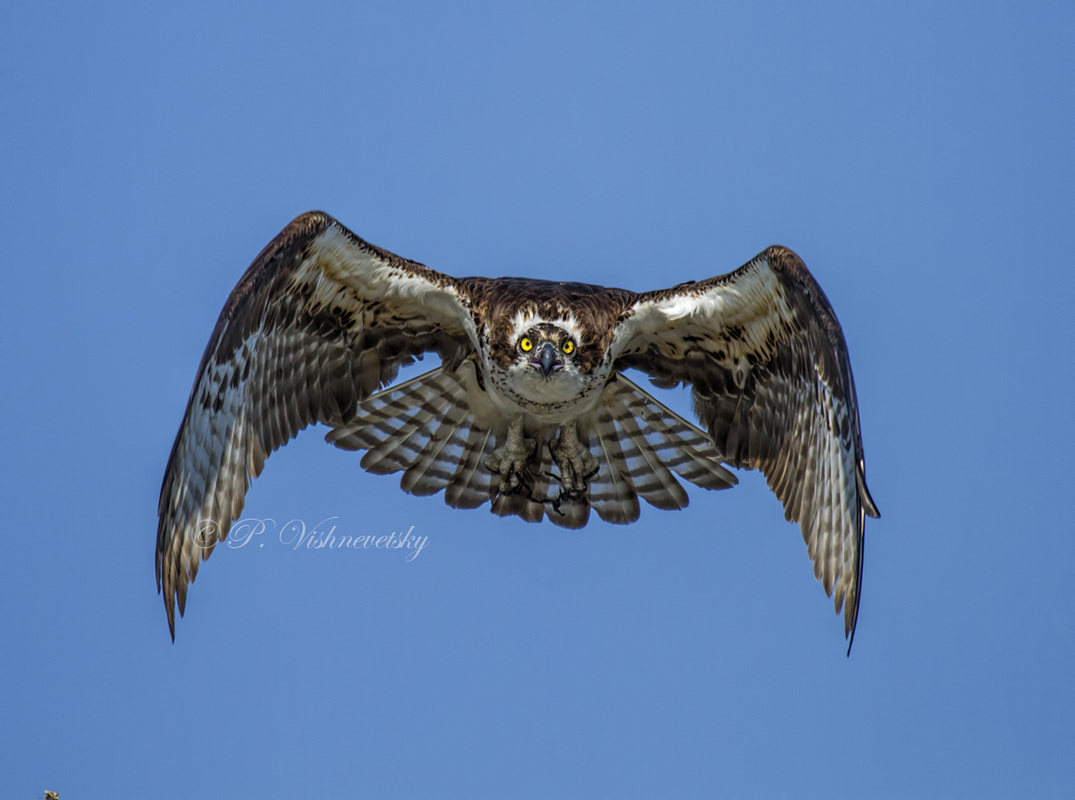
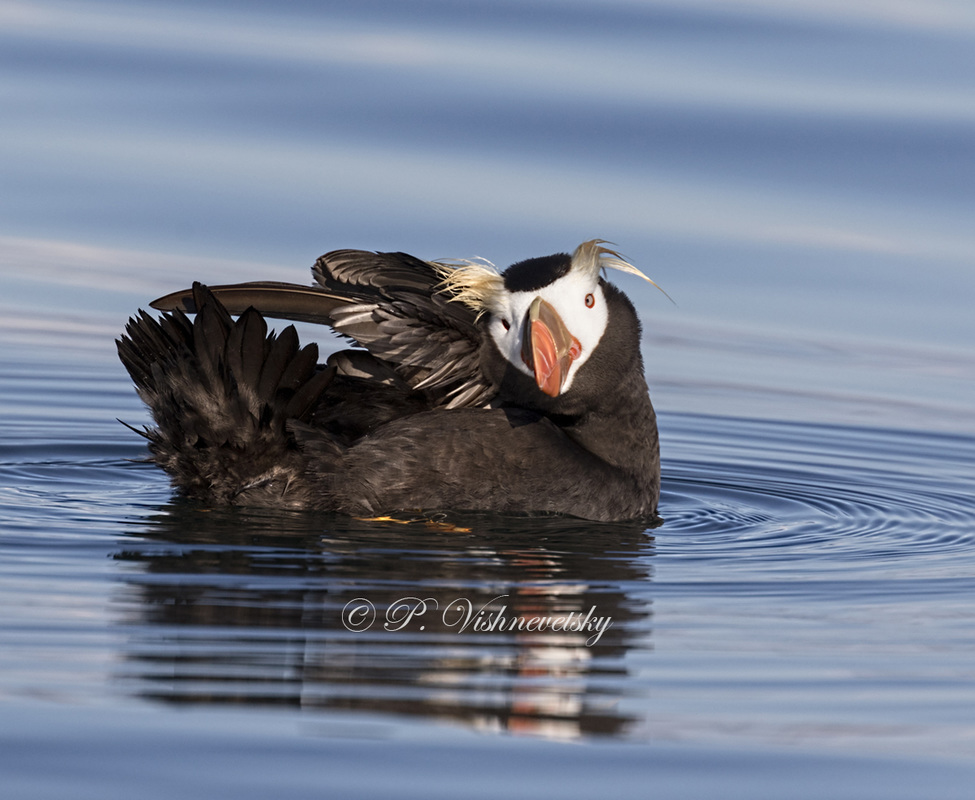
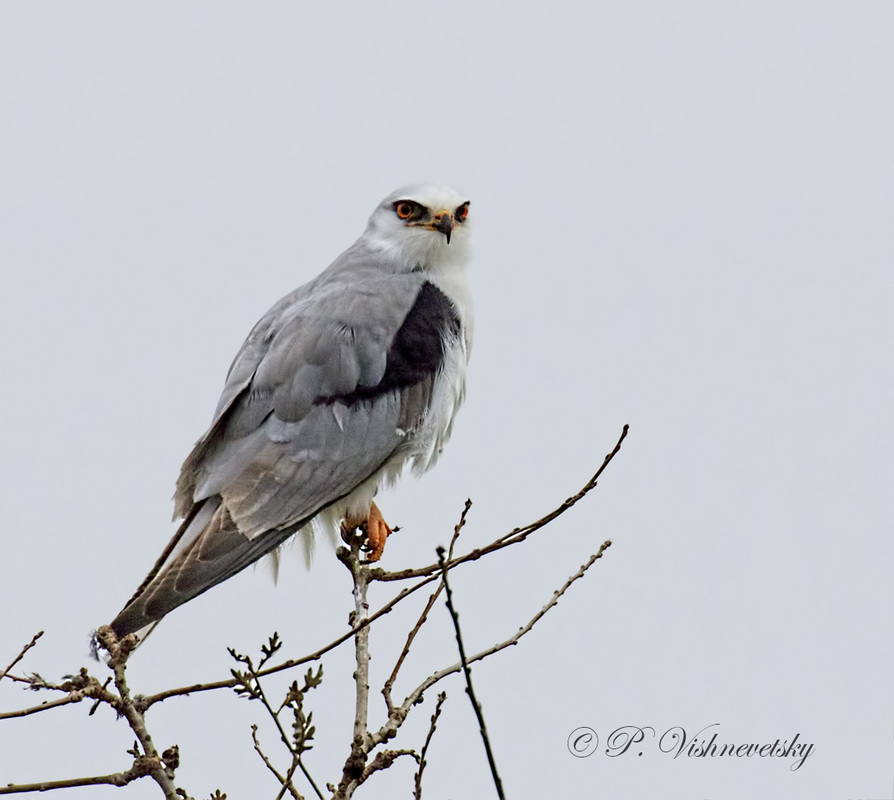
 An Interview with Wildlife Photographer Patricia (Trish) Vishnevetsky 1. Why wildlife? (why do you shoot wildlife?) PV -Probably because growing up in New Zealand there wasn’t much “wildlife” to be seen however since coming to live in Washington State where you can see bald eagles, hawks, falcons, foxes, etc,, on a regular basis well that was a real eye opener for me. The beauty of these creatures is still amazing to me and I will never cease to be anything but in awe of them. 2. What was your first wildlife photograph? PV - A bald eagle. 3. Your favorite wildlife subject? PV - It would have to be all types of raptors. 4. Your favorite wildlife location? PV - That I can’t answer because everywhere you look there is something incredible just waiting to be photographed. 5. Most dangerous shot? PV - I can’t honestly say that I have been in any danger at any given time unless you call falling over into mud after waiting around in the freezing cold for some snowy owls to actually do something other than sleep. 6. Luckiest photograph you captured? PV - It was of a bald eagle taking off from a rock and the wing feathers covering its face in a striped pattern but leaving the eye shining thru. 7. Most memorable? PV - Kits, the innocence of them and the trust they sometimes show by walking up to you and just looking at you – quite takes your breath away. 8. Technique tip PV - Practice, practice and more practice and never be afraid to try something new. 9. Equipment tip PV - Make sure you have your camera with you at all times – you never know when “the” shot will happen. BIO
When I was living in New Zealand I had a Panasonic Lumix that I would take with me when going on hikes in the countryside. My photos mainly consisted of flowers and plants that were growing on the hillsides. However, since moving to the northwest and seeing a bald eagle for the first I just had to go out and photograph them which was no easy task after only stationary objects. Gradually with the assistance and splendid advice from some good folk I slowly learnt a bit more and with the help of my wonderful cameras (Canon 7D Mk II and Canon 5D Mk III) I am now able to get some reasonable photographs. Visit Trish's website |
AuthorPhotography and photographers... A look at both. Blame it on the light. Archives
June 2017
Categories
All
|


 RSS Feed