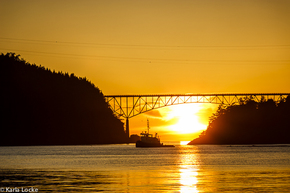
 photo by Karla Locke photo by Karla Locke by Karla Locke Show A Little Respect To Photographers Recently a friend saw this image of mine being used on a local TV station’s blog. Cool right? Normally, yes. What irritated my friend was that the writer did not give photo credit to me as the photographer. My friend took it upon herself to be my advocate and let the station know. At the same time, another friend, tweeted to let the writer know it’s just not cool not to give credit where credit is due. Writer’s have bylines, so should photographers. The writer corrected the issue right away, giving photo credit and an apology. Did the writer mean any disrespect? I am sure they didn’t. Then the question is: why not give photo credit? It is just a simple caption to an image. Has photography become such a day-to-day commodity that everyone feels free to use an image as they please? Why do people think that it is okay to take an image and use it on their blog, website, Facebook, even book covers without asking? Without credit? Without paying for it? Just because it is on the internet does mean someone should not be respectful and ask for permission. Or, give credit. I believe it is because almost everyone is taking photos nowadays and for most people it is just a hobby. A way to share, which the digital age has encouraged. Most people are flattered when others share or use their images, even if credit wasn’t given. But photography is not a hobby, it is an art form. And we should be respectful. Not just to photographers, but all artists, including literary. Be respectful–ask permission first. They will either say yes or no, they may want a fee for the use of their image (licensing), which is only fair. In the past, that writer would have had to ‘pay’ for the use of my image. Be respectful–give them credit. This is common courtesy. Let others know who the photographer (artist) is. Give credit where credit is due.
0 Comments
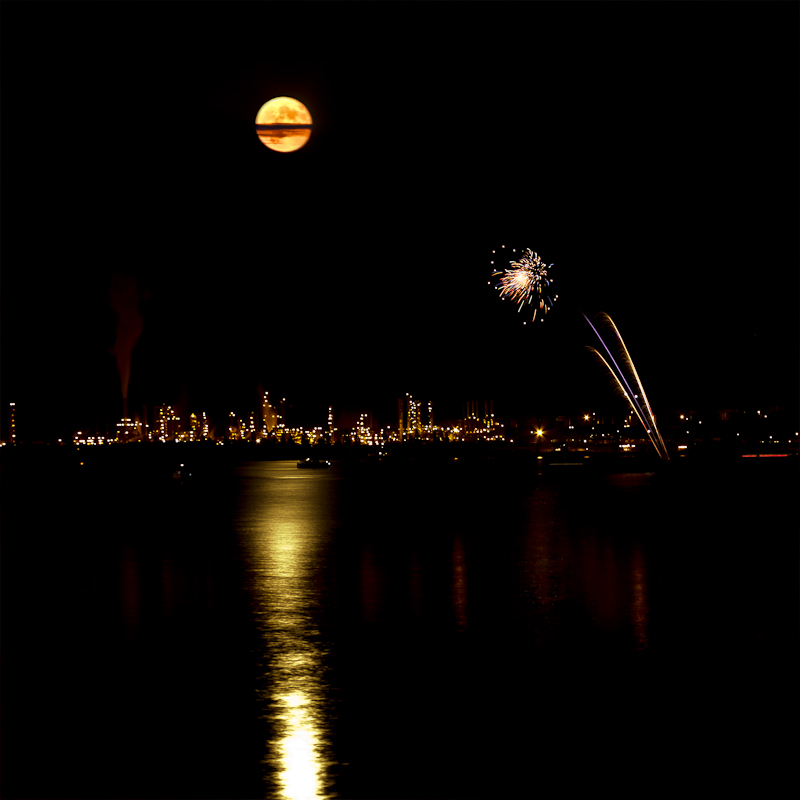
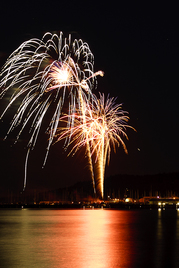 Photo by Tony Locke Photo by Tony Locke This weekend, you and millions of others around the country will be pointing your cameras at the sky. Many of you will come away with some pretty good photos. With fireworks, just as in other night photography adventures, making the best fireworks images will require some advanced planning, not just before the event, but before it gets dark. For the simple quick-and-dirty shooting of fireworks, so you can share with friends, you can use a point-n-shoot or a smartphone. Just simply hold your camera/phone up in front of you and shoot away. This will give you decent fireworks photo. Some of which will be blurry. A majority of you will be happy with that — But, if you’re not content with “pretty good,” read on. One of the most important aspects in night shooting is to mount the camera on something stationary; such as a tripod, railing, or even balance it on the top of your ice chest. Since it is dark out, your shutter speeds will need to be open longer than normal. Even for those of you that haven’t been drinking, it is going to be hard to hold steady. That one step will instantly take your pretty good photos up a notch or two, even if you leave the rest of your settings on Auto. Speaking of which, if you would rather not fiddle with all of the settings I’m about to describe, feel free to set you camera on Auto, iA, or better yet, if your camera has a Scene Mode called “Fireworks,” use it. Let the camera do the thinking for you. 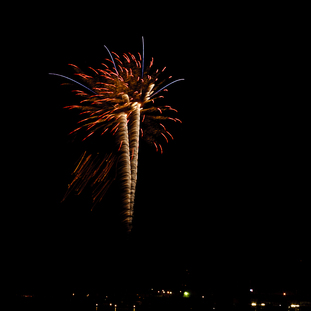 Photo by Tony Locke Photo by Tony Locke Composition: The key to making great fireworks images is to give your composition an interesting foreground or background. Photos that only show the sparkly parts of the show may appear striking at first, but won't hold our interest. Now that your camera is sitting steady, choose a composition. The most important part of your composition will be to determine where the fireworks are going to be set off. Once you know this, explore the landscape in every direction for a great spot to set-up and shoot from. Once the first couple of fireworks have been sent up, you’ll have a better idea of how to set your camera. Don't assume you have to be up close for the best shots. If you get a good distance away from the show, and if you have a good foreground, your images will look that much better... If you can find one, backgrounds work best. If you can, shoot from a high vantage point. In my hometown of Anacortes, the fireworks are shot out over the water, and we’ve got a few hillsides and high points above the water that make great locations. You might want to get there early to stake out your spot! One disadvantage of high vantage points, however, is the fireworks can become lost in the clutter of the background. Your foregrounds will need some sort of lights or structures; such as, a city skyline to define the bottom of your image, with the show above, otherwise they may not show up well. The other common setting is at ground level and looking up at the fireworks so they are isolated against the sky. Try shooting from a low angle, this works best for including an interesting foreground. Look for scenes with graphic lines; such as bridges, sailboats, and skyscrapers. They make great foregrounds. Find an angle which will allow you to compose, so most of the fireworks are isolated in the sky above the foreground. If you happen to live in an area, where the foreground is water, this will provide great reflections too. Reflections always make good photos regardless of the subject, but with fireworks, well, take a look… 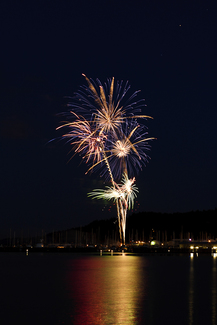 photo by Tony Locke photo by Tony Locke Find your location well in advance, a vantage point that is far away from the crowds if possible. You don’t want someone bumping your tripod once the show starts. Once you’ve got the composition you like, be prepared to fine-tune it after the first burst occurs. Focusing: Autofocus on the first burst or two, and then turn the camera’s autofocus off for the rest of the show. Otherwise, the camera will keep trying to refocus on every shot. If you do not have a foreground that will require a lot of depth of field to be sharp, this will work great. But if the foreground is closer; such as, landscapes, water, etc, and you would like some detail to show, you might need to focus on the foreground, at a spot between it and the fireworks. Think about the aperture you will be using, how close the foreground is, and how far away the fireworks are, for the best depth of field. Exposure: In Basic Photography 101 - proper exposure comes from a combination of aperture, shutter speed and ISO, all determined by the brightness of the scene. Each has its own purpose for different styles of images. For fireworks, shutter speed mainly affects how many fireworks will show up in a single frame. If your main concern is the fireworks, then this is the approach I like best: Set the shutter to Bulb Mode and manually fire the shutter with a cable release and hold the button down, leaving the shutter open until one or more bursts occur, then release the button to close the shutter, repeat again for the next set of firework bursts. You will capture several bursts on top of each other in the same shot. If you don’t use Bulb Mode or don’t have a cable release, then set your Shutter Speed to around 5-10 sec or so, then gently push the shutter button while the fire-ball is going up into the sky, your shutter will remain open for that 5-10 sec, then shut on its own. Experiment. For Aperture, start with a setting of f/8 and an ISO of 100 to 200. After those first burst have been shot, quickly check the LCD screen to see how the exposure looks, make any adjustments as needed, and then leave it set for the rest of the show. If it is too bright, lower you ISO, if it was it was higher than 100, or move your aperture to f16. If too dark, move your aperture to f6.3 or f5.6. You’ll want to keep the shutter speed in the 5-10 sec or longer range in order to capture not only enough light, but multiple bursts, but you can experiment with longer or shorter shutter speeds too. Some of the very bright bursts (particularly those pure white) will appear overly bright and blown out, while some of the smaller ones will probably be a bit underexposed You can't change exposure for every burst. Pick something that works for most of the shots and go with it. Be careful that your settings don’t overexposure too many of the bursts though, you’ll lose all of the color and they’ll all look pure white. Second trick: If there is a well lit foreground or background in the composition, you will have to make a few more adjustments when determining exposure. Start experimenting when it starts to get dark and the ambient light starts to closely match the lighting during the show, take some test shots and determine the proper exposure for the scene. Start with an ISO 100 to 200 and f/8 to f/16 as above. Higher ISO settings will increase exposure, but will also increase the noise in the black of the sky. Experiment more with the aperture until you end up with a shutter speed from about 5 to 10 seconds range. Another great trick is to set the shutter to Continuous instead of single shot and let it rip off several shots, while the fireworks are doing their thing. Cable release comes in handy for this. Just make sure you are still keeping track of the exposures while you shoot. Make sure you have plenty of memory card space. You’d hate to have a full card just as the finale starts. It is the end of the show, time for the Grand Finale – Get ready to change the settings quickly. That 5 to 10 second shutter speed you have been using is now probably going to blow out the Finale. Try 1 or 2 second instead. If you have been using Bulb Mode, quickly open and close the shutter with your cable release during the Finale. You also might need to zoom back slightly to capture more of the sky. Unfortunately with most lenses, the focus changes when you change focal length, so be ready to refocus or quickly switch the autofocus back on. To eliminate some of those issues, I will zoom just a small amount, as the focus distance will still be close to infinity. I might also gently point my camera a wee bit higher to catch everything. If you’re not familiar enough with your camera to change settings quickly, it's not a bad idea to keep the settings for the Finale the same as it was. Enjoy the show! |
AuthorPhotography and photographers... A look at both. Blame it on the light. Archives
June 2017
Categories
All
|
 RSS Feed