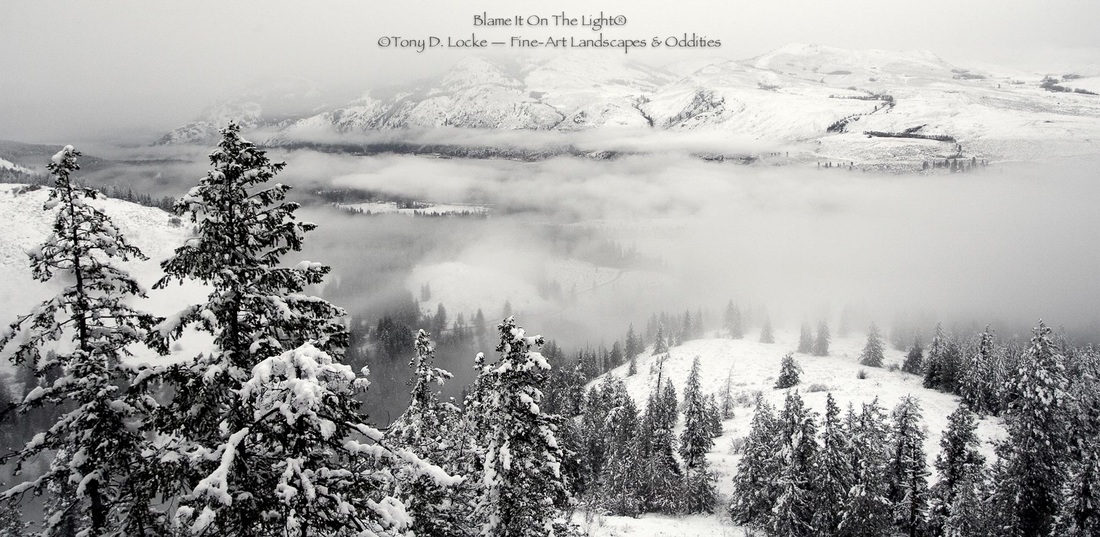
Imagine shooting in a snow storm in Antarctica. Living in the Pacific NW, our weather challenge is—rain. Like the Antarctica snowstorm, rain can be harsh on camera gear. During the month of December we saw so much rain that waterfalls were dispersing water at rapid rates and rivers were overflowing. This makes ideal conditions for extreme weather photography. Shooting in the mountains with freezing temperatures and howling wind can produce a stark contrast of snow against the trees and rocks. Photograph beaches where waves upon waves of salt water wash ashore. Freezing snow, ice, rain, and splashing salt water, all great for shooting, but can be rough on your camera gear. You may be putting yourself and your pricey gear at risk in order to get these extreme weather shots. The mantra of every adventurer is be prepared. Plan ahead, take all precautions, then enjoy and capture the image that says it all. Here are a few suggestions to help: 1. Place Silica Gel Packets In Your Camera Bag Silica Gel Packets— you will find them in certain shipments and in vitamin bottles. Moisture can wreak havoc on camera equipment. These magic little things help reduce moisture by helping to keep it out, especially condensation. A simple thing goes a long way toward protecting your gear. 2. Don’t Open Your Camera Outside This may sound like a no brainer, but in the rush of the moment you just might forget. It is amazing how fast dust, water, even snow can get on the sensor or inside those magical electronics, trashing a camera faster than you can say “OH S&*T!” When you need to change a lens, battery or memory card, jump inside some type of shelter or car. If those options are not available, do it inside your jacket. Turn your back to the wind and bend over to use your body to protect the camera. The same goes for when opening your camera bag to retrieve another lens or memory card. Block the wind or weather, and shield the bag with your body or with your coat opened. Keep memory cards and spare batteries in your pocket, to save having to open your camera bag. Another option… shoot with the lens you have. Don’t risk it. * If shooting at a location that is not freezing, you can skip these next two steps. 3. Don’t Bring Your Cold Gear Into A Warm Place Unprotected After enjoying a day of traipsing through snow or cold weather conditions, when you get back inside the warm room or tent, leave your camera protected inside the bag while you settle in. Take off your winter gear and get a hot drink to warm your hands. This allows the cooler temperature inside the bag to equalize with the warmer indoor air. One of those odd facts in that Physics Class book from years ago mentions something about “cold metal exposed to warm, (often humid) air will result in massive condensation.” The cold metal would be your camera and lens, and if exposed, it can quickly become wet with condensation, inside and out. You can’t argue with Physics so let your camera rest in the bag while you relax with a hot drink. 4. Save Your Batteries Power By Keeping Them—And Your Hands Warm Freezing conditions just plain suck the life out of batteries — Another one of those weird physics things. Cold batteries reduce the number of shots you can take before you have to change them. NOTE: When it comes time to change them, review Step 2. Add a little extra warmth, and life, by keeping spare batteries in an inside pocket of your jacket, possibly with one of those hand-warming packets. When you see the battery getting low, quickly swap it out with a warm one. There is a weird phenomenon that as a battery warms up in your pocket it will slowly regain some of the charge lost while in a cold camera. Not a full charge, but enough to have ready for that next battery swap. Besides keeping your batteries happy, have a few extra hand warmer packs to keep your fingers (and toes with electric insoles) warm so you can continue to shoot in relative comfort. 5. Ziplock Bags Save The (Rainy) Day Don’t have rain gear for your camera? In a pinch, use a ziplock bag. I keep one (or two) of the large storage bags handy in each of my camera bags. Put a slit in the bottom seam, just large enough for the lens to poke through, slide the camera in so the lens just barely sticks out, put a rubber band around the end of the lens, with the “zip-lock” side towards the rear of the camera, then put on the lens hood for added protection. For the best rubber bands, go to the produce section of your grocer, look for the broccoli, cauliflower or other large veggies with those big fat rubber bands holding them together. Have the veggies for dinner and use the rubber bands on your homemade rain protection. They work great. Storage bags are cheap, plentiful by the box, and when not in use, the bag easily folds up into a very small package, wrapped with the rubber band to keep it together, ready for use during that next down-pour. Those ready-made rain covers are nice too, just make sure you always have something with you. If you lose or break the rubber band, you can always use the MacGyver solution via duct tape or string to hold the bag in place. You do have duct tape with you, don’t you? I also carry a small towel (see #6), which allows me to wipe things down and doubles as a quick rain shield. Speaking of weather proofing, when looking at camera bags, go for one that has a pull-over rain coat to protect it. Purchase inexpensive “ready to use” rain pouches, such as these from OP/Tech....
7. OK, Now Something Controversial — UV Lens Filters
If I don’t have a polarizer or neutral density filter on my lens, I always have a high quality UV filter. Why? Protection. Yes, there are some that say you have extra glass impeding your image. Personally, I have never seen any issues. It is possible when using an inexpensive UV filter, but not a quality one. The other reason I use a UV filter — I have had a lens take a dive from a not properly secured quick-release. The front element of my lens remained unharmed, unfortunately (or fortunately) the sacrificial UV filter shattered. There is also the added protection of the expensive coating on the lens surface from blowing sand, ice pellets, snow and rain. It is much cheaper to replace a UV filter than to buy a new lens or replace an element. Another added bonus—the UV light protection also helps reduce some haze and blocks UV light from hitting your sensor.
8. Don’t Leave Your Vehicle
Sometimes the weather is too extreme. It doesn’t matter if you are at the beach, in the desert, or in the mountains, when the wind is howling it might be best to wait it out in the safety of your vehicle. Try shooting from inside your car, it could produce some unique shots due to your limited range of motion. Sand, or even worse, its smaller cousin silt, can quickly get itself inside all of the tiny workings of your camera and lens, especially the focusing and zoom rings, making them grind (pun intended) to a halt! At the beach salt water is one of the most corrosive elements around (besides Coke, which will quickly eat through a nail. YouTube it). Splash or mist from ocean waves can attack very quickly while your mind is in the zone shooting. Fresh water lakes aren’t as bad, but water is still water. Electronics and water are not good friends. Snow, sleet, and hail are just frozen water and can create havoc on your gear. Sometimes, when the conditions demand it, it is just best to shoot from your vehicle—at least until Mother Nature calms down and takes a break.
0 Comments
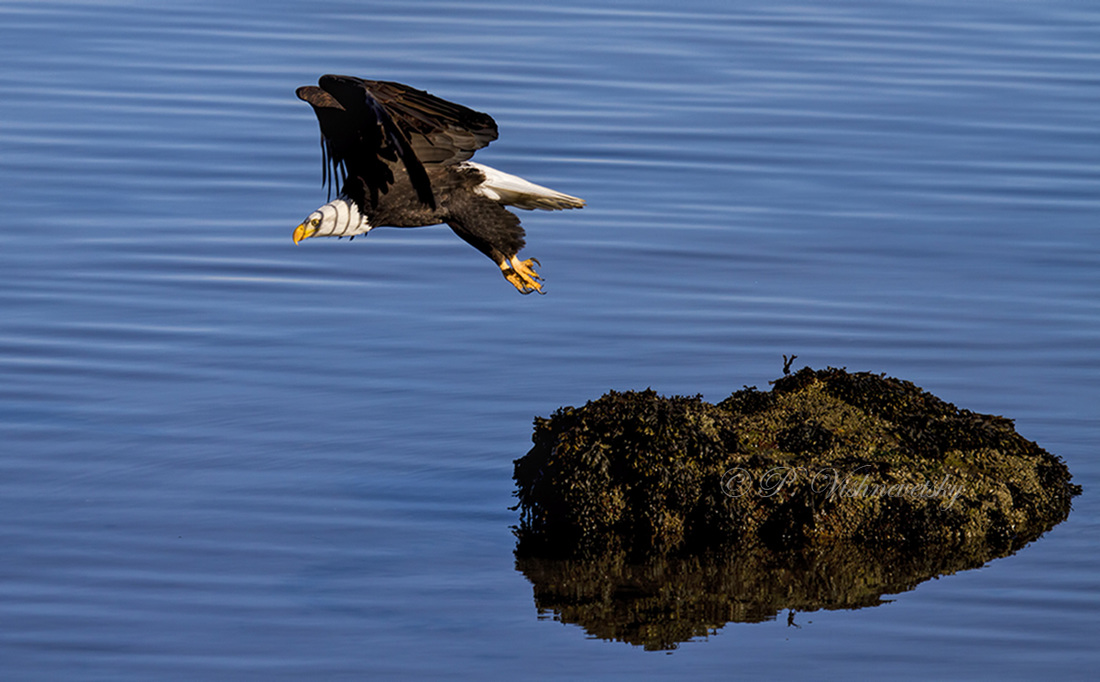
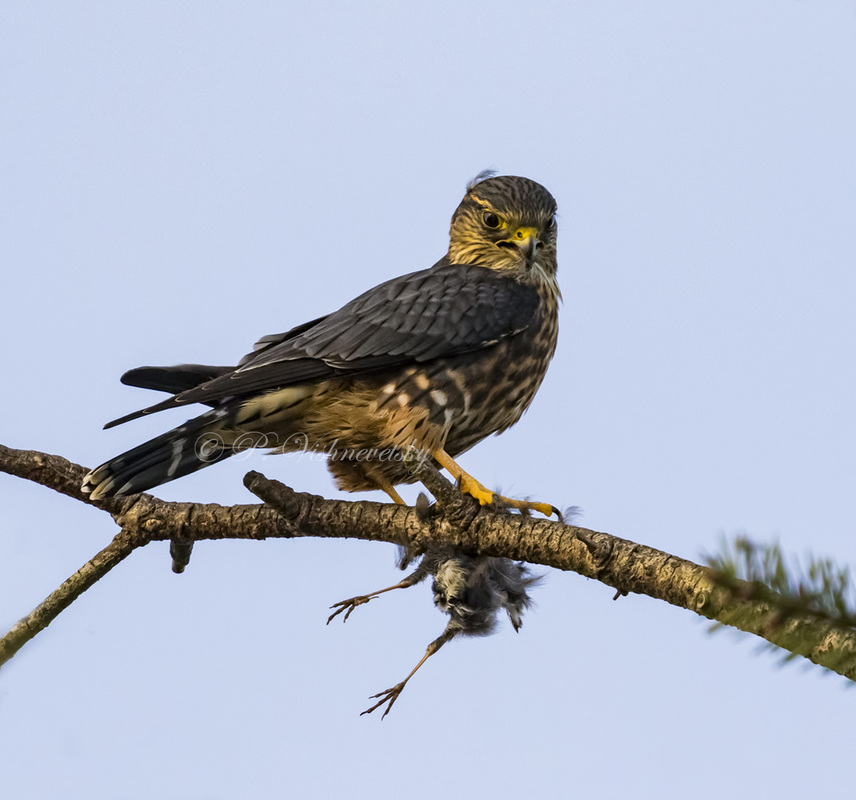
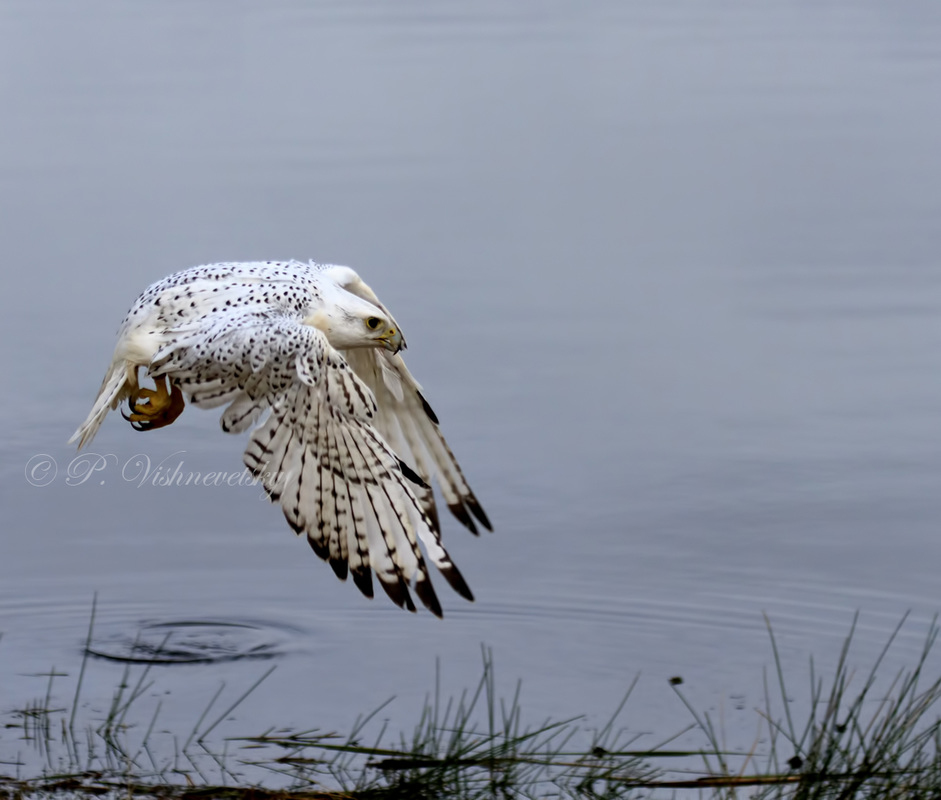
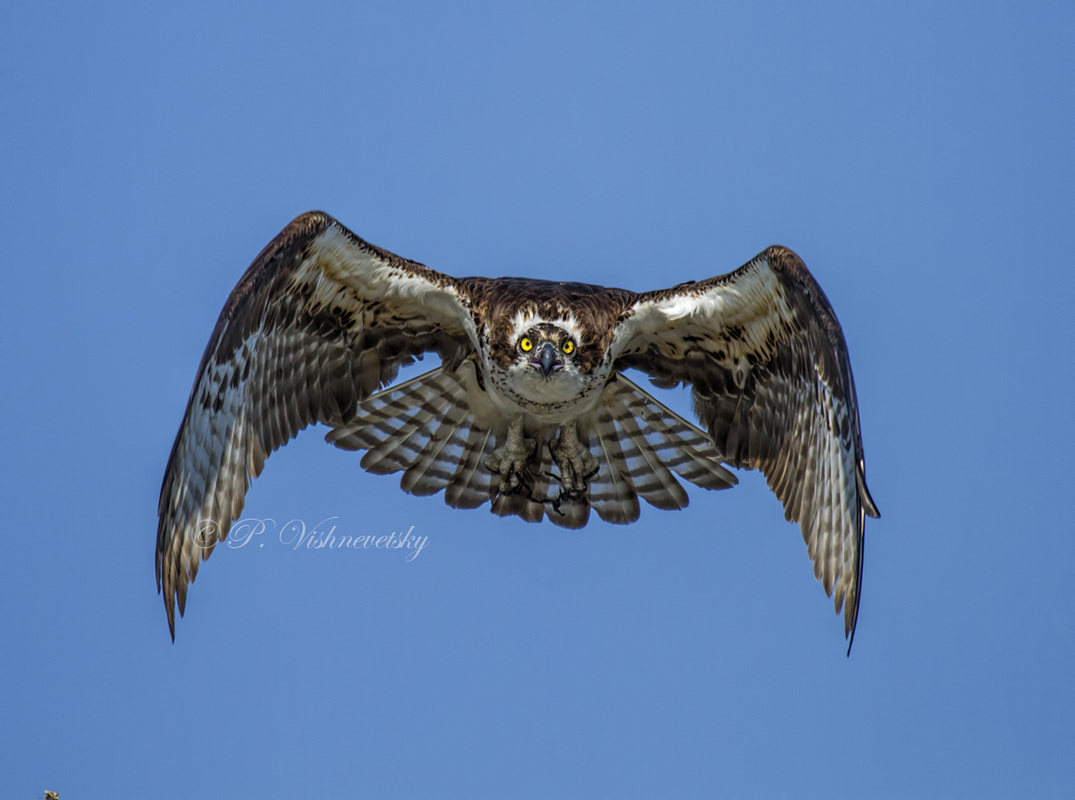
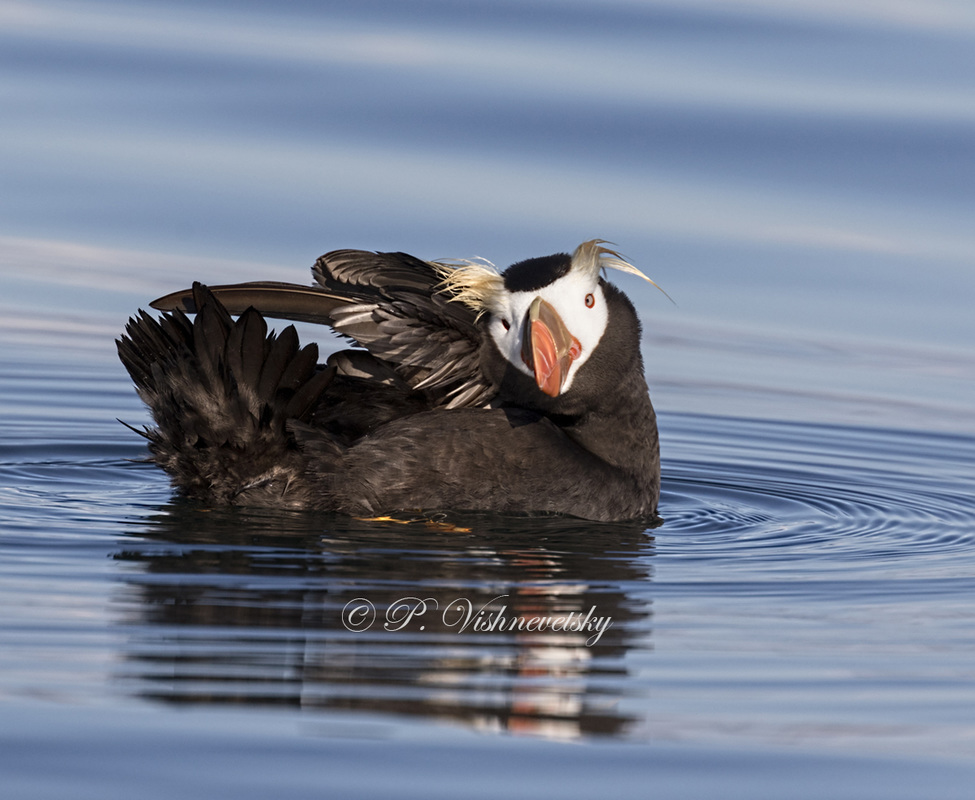
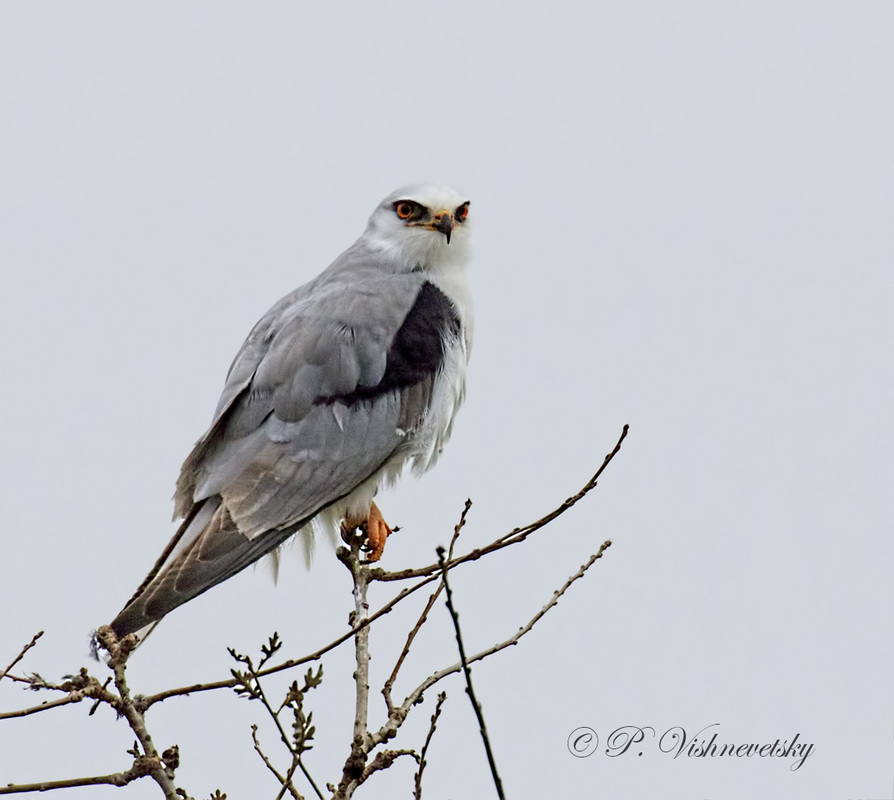
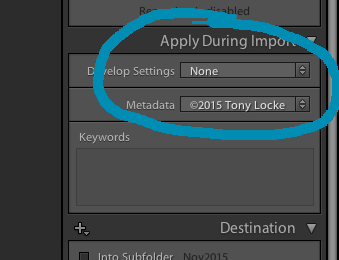 When you Import images into Lightroom you can add Metadata to the images, most importantly, you can add your Copyright information, along with contact info. Just another layer of protection of your images. Open Lightroom, while in the Library Module, click on the Import button on the bottom left. About midway down the right panel, you will see Apply During Import, if you don't see the option fields, click on the triangle to the right to open that tab, it is under this tab where you can apply Develop Presets, Metadata and Keywords to images as they are imported. The first drop-down is Develop Settings. Normally you can chose any of your existing Presets, but I don’t recommend doing it at this point of the import, otherwise all the images imported will have that Preset applied—Good or Bad. For this blog will will leave it set to None. My Apply During Import still shows ©2015 Tony Locke in the Metadata drop-down, we are going to change it to ©2016 for the New Year. 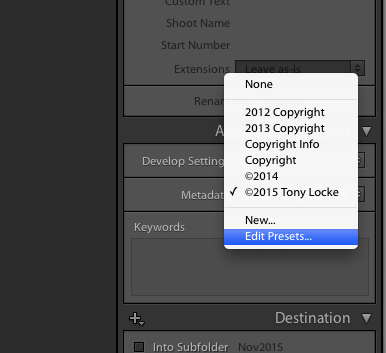 Click on the Metadata drop-down and chose Edit Presets. The Metadata Window will now show. In here, you can add as much or as little information as you would like. I keep mine minimalistic, with just the main important information. Add whatever additional information you would like. 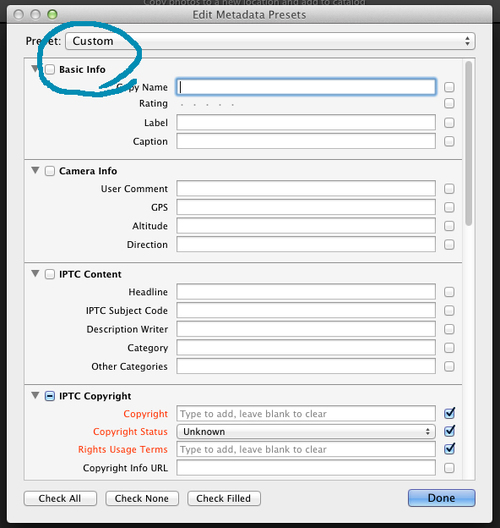 When this window first opens, you will see a Preset name Custom. Here are the Metadata fields that can be filled in. The red fields are Lightroom’s minimum recommended fields to add, so we will start there. You can click on the triangles to the left of each tab to close sections if you like. 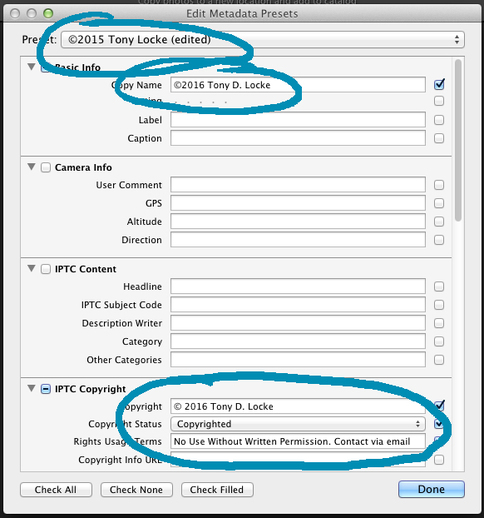 At the very top, under Basic Info - Copy Name, add ©2016 YOUR NAME. To make the Copyright Symbol PC - On Windows based computers you can add the copyright symbol with a few simple keystrokes. Press the "alt" key and hold it down while typing "0169" on the keyboard to create the © symbol. ALT0169 MAC - On an Apple computer, it’s simply “Option-G” to produce the © symbol In the tab IPTC Copyright, add more specific information, as shown in this example of what can be used. 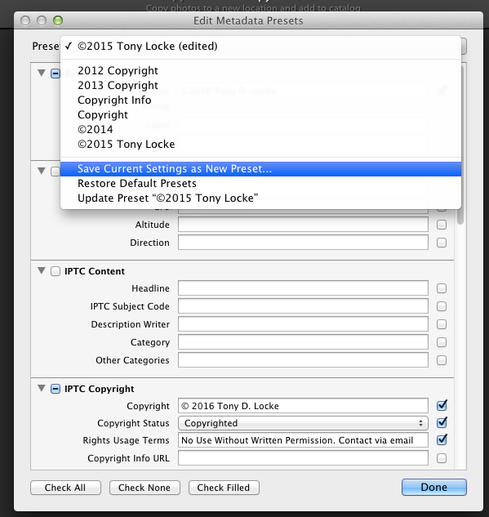 Go to the top Preset drop-down and choose Save Current Settings As New Preset…And give it a name you will remember… 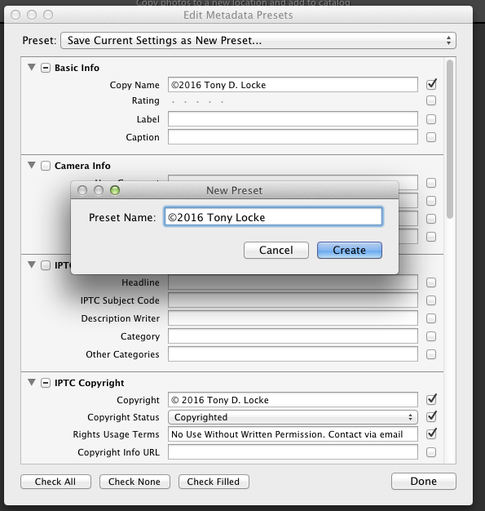 Here is where you can name the preset. Usually you just put the copyright symbol, year, and name.  Scroll down to fill in the IPTC Creator tab. I usually add name, city, state and country, along with my email address (which is removed here) and my website. This information will make it easy for someone to contact you should they have questions about your image. 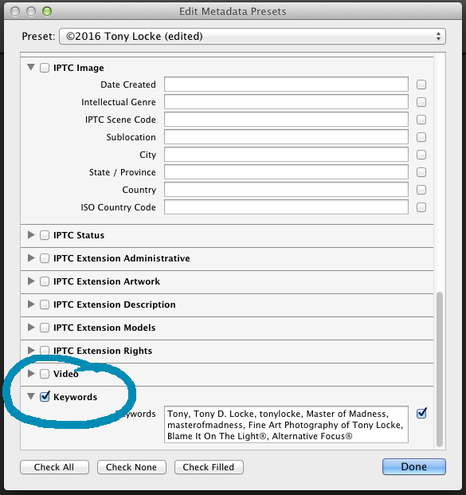 Down at the bottom you will find the Keywords tab. Here you can enter any Keywords you would like to have added to every single image you import to Lightroom. I have my name in all variations it may be found or searched by along with my fine art brand names; Blame It On The Light & Alternative Focus, as those are searchable Keywords for my images also. This will save you the time of entering those Keywords into the Keywords field in all future imports. 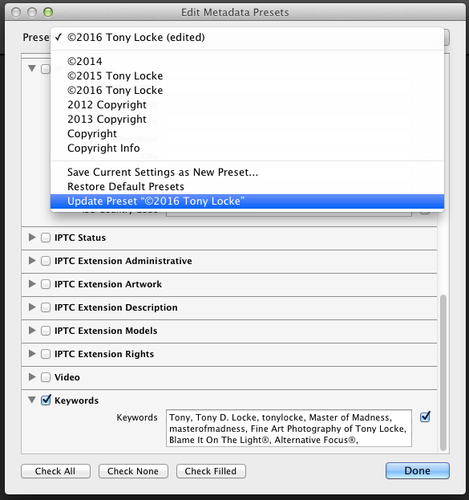 You will notice at the top of the window, the Preset name now shows the word (edited), this is to warn you that you have made changes to the preset since naming it. Click on it and choose Update Preset ©Your Name, then click on Done at the bottom. 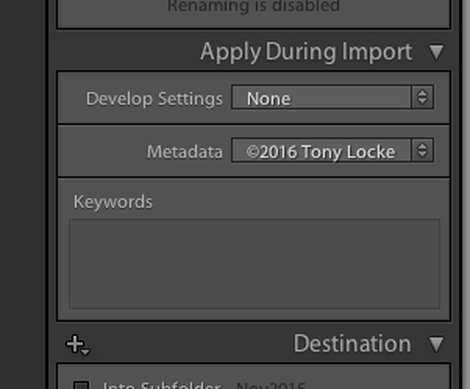 In the import window’s Apply During Import tab, choose your new Metadata Preset, which will then be applied to all photos you import in 2016.  An Interview with Wildlife Photographer Patricia (Trish) Vishnevetsky 1. Why wildlife? (why do you shoot wildlife?) PV -Probably because growing up in New Zealand there wasn’t much “wildlife” to be seen however since coming to live in Washington State where you can see bald eagles, hawks, falcons, foxes, etc,, on a regular basis well that was a real eye opener for me. The beauty of these creatures is still amazing to me and I will never cease to be anything but in awe of them. 2. What was your first wildlife photograph? PV - A bald eagle. 3. Your favorite wildlife subject? PV - It would have to be all types of raptors. 4. Your favorite wildlife location? PV - That I can’t answer because everywhere you look there is something incredible just waiting to be photographed. 5. Most dangerous shot? PV - I can’t honestly say that I have been in any danger at any given time unless you call falling over into mud after waiting around in the freezing cold for some snowy owls to actually do something other than sleep. 6. Luckiest photograph you captured? PV - It was of a bald eagle taking off from a rock and the wing feathers covering its face in a striped pattern but leaving the eye shining thru. 7. Most memorable? PV - Kits, the innocence of them and the trust they sometimes show by walking up to you and just looking at you – quite takes your breath away. 8. Technique tip PV - Practice, practice and more practice and never be afraid to try something new. 9. Equipment tip PV - Make sure you have your camera with you at all times – you never know when “the” shot will happen. BIO
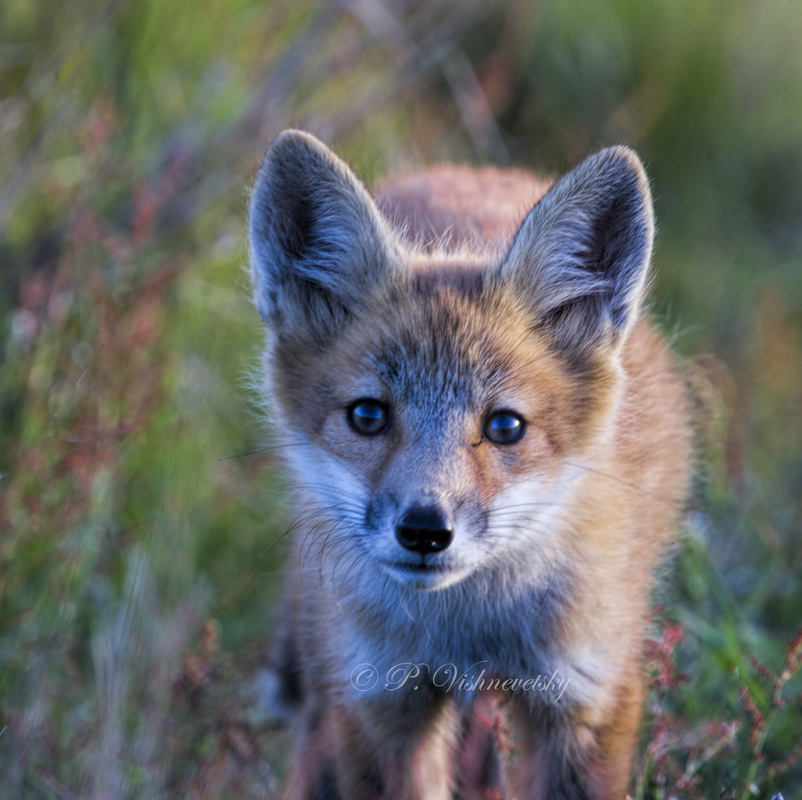
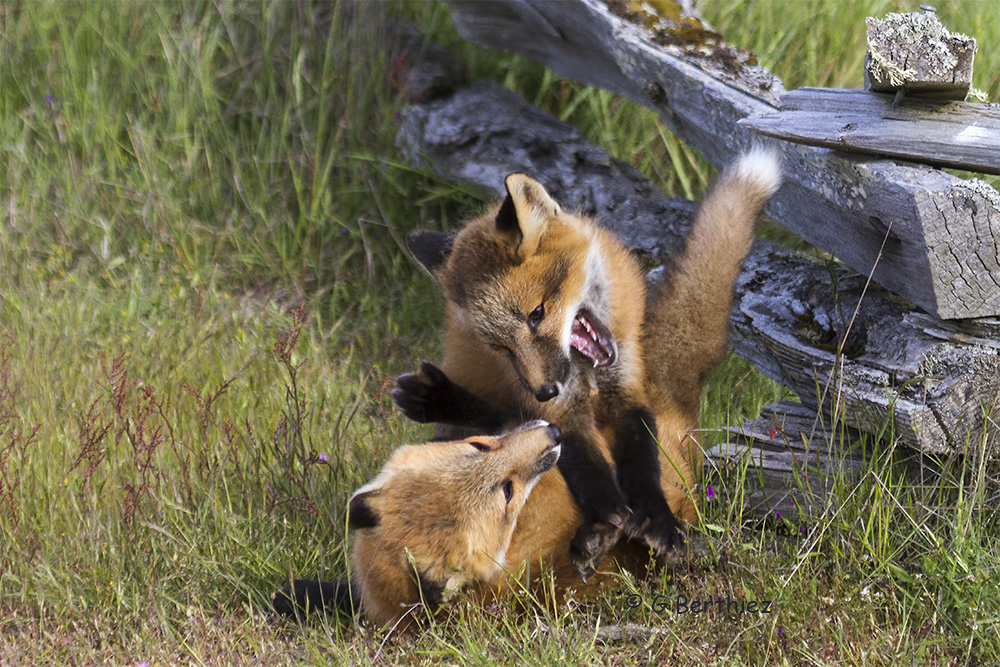
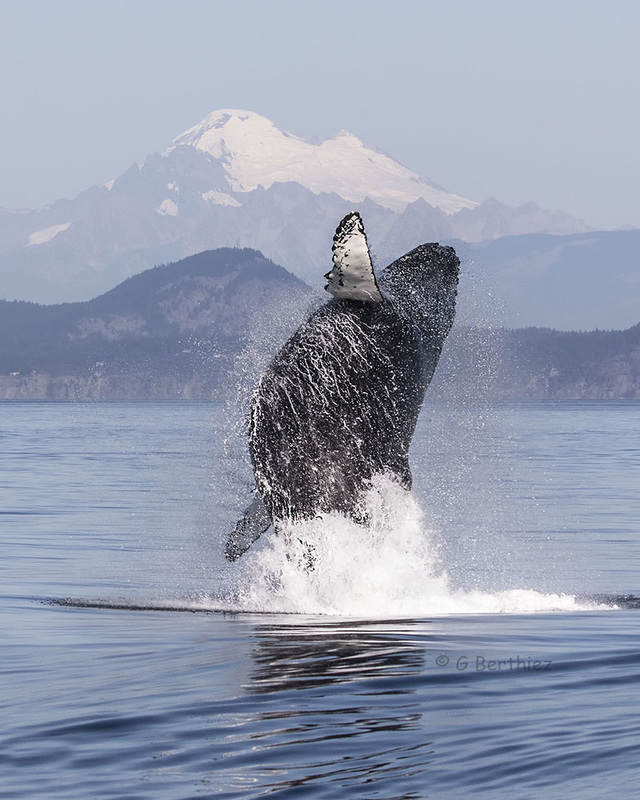
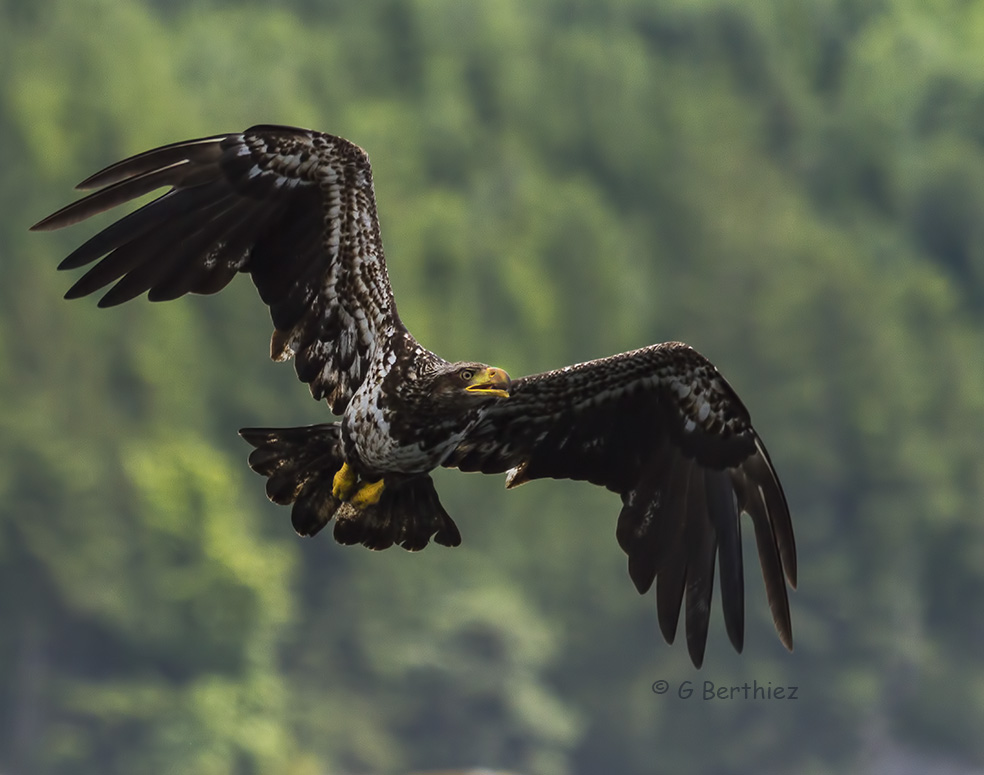
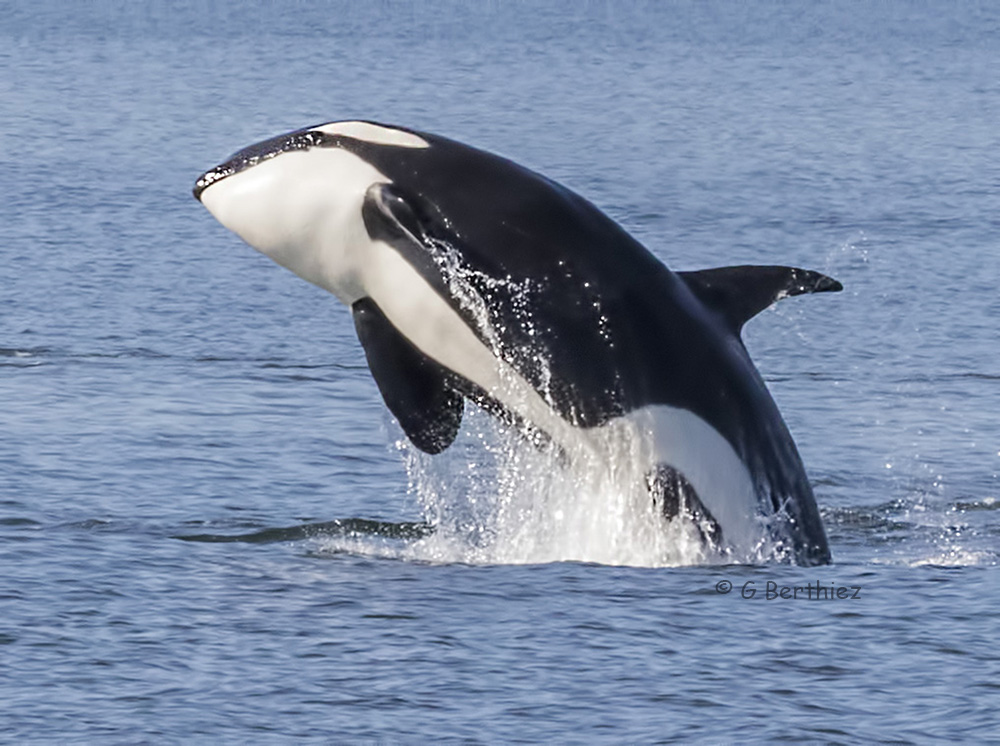
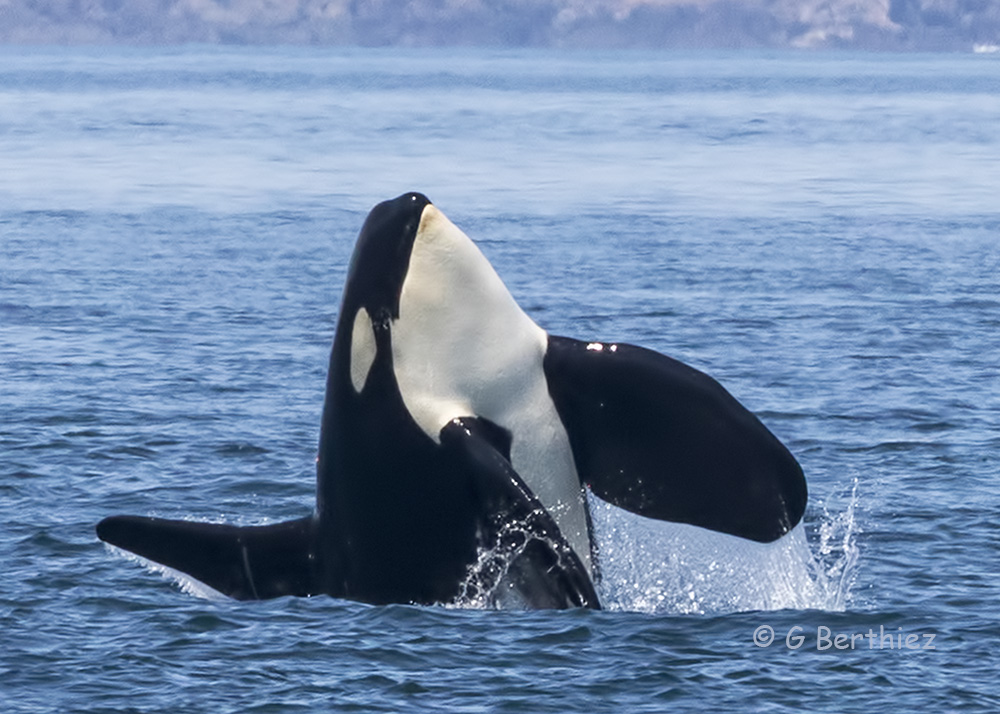
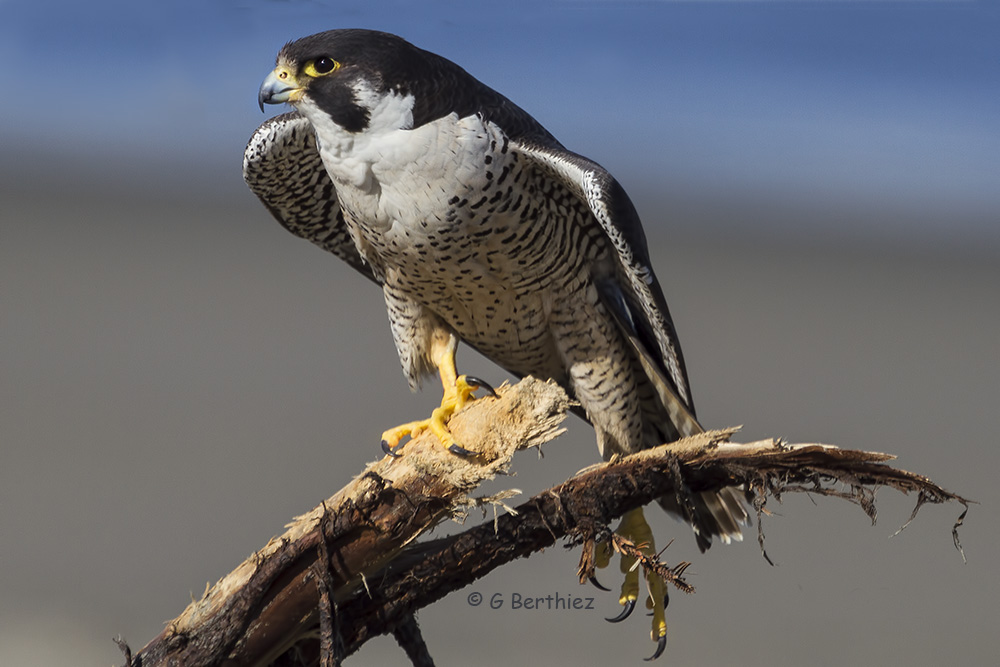
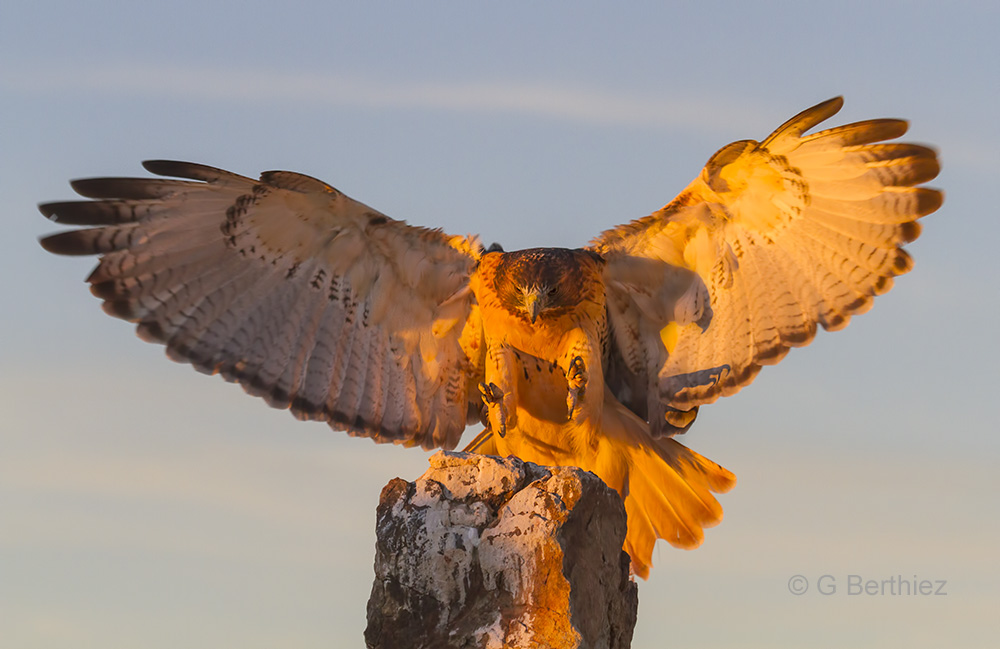
When I was living in New Zealand I had a Panasonic Lumix that I would take with me when going on hikes in the countryside. My photos mainly consisted of flowers and plants that were growing on the hillsides. However, since moving to the northwest and seeing a bald eagle for the first I just had to go out and photograph them which was no easy task after only stationary objects. Gradually with the assistance and splendid advice from some good folk I slowly learnt a bit more and with the help of my wonderful cameras (Canon 7D Mk II and Canon 5D Mk III) I am now able to get some reasonable photographs. Visit Trish's website  An Interview with nature photographer Gwen Berthiez 1. Why wildlife? GB: I shoot wildlife because it takes me outdoors and brings peace & quiet to my soul, and wonderful, non-political, honest wildlife beauty to my senses – besides – it’s an excuse to be out in the woods and doing whatever I want to do – far away from offices & human nonsense stuff. 2. What was your first wildlife photograph? GB: An American Bald Eagle 3. Your favorite wildlife subject? GB: Raptors and whales of all kinds 4. Your favorite wildlife location? GB: Absolutely anywhere in the PNW 5. Most dangerous shot? GB: Cape Kiwanda while avoiding the sizable & unpredictable rogue waves 6. Luckiest photograph you captured? GB: A shot of a humpback whale in full breach lined up in front of Mt Baker & Mt Erie – awesome luck!!! It will never happen again for me. 7. Most memorable? GB: A beautiful little red fox, who thought I had something for him to eat, so he ran straight up to ‘speechless’ me. I had never seen a red fox before and was awed in the first place just to be near one, much less to be able to capture a very unsteady shot with a completely new & unfamiliar camera. 8. Technique tip GB: Especially with wildlife, if you are not out there – you cannot catch that image. Be there and take lots of photographs. When you go out, decide exactly what you are looking for & want to photograph. Take the right equipment all prepped to catch that shot. And even more important – know your equipment thoroughly. 9. Equipment tip GB: Keep it simple & don’t weigh yourself down with lots of unnecessary, heavy stuff – travel as lightly and as efficiently as possible. Bio:
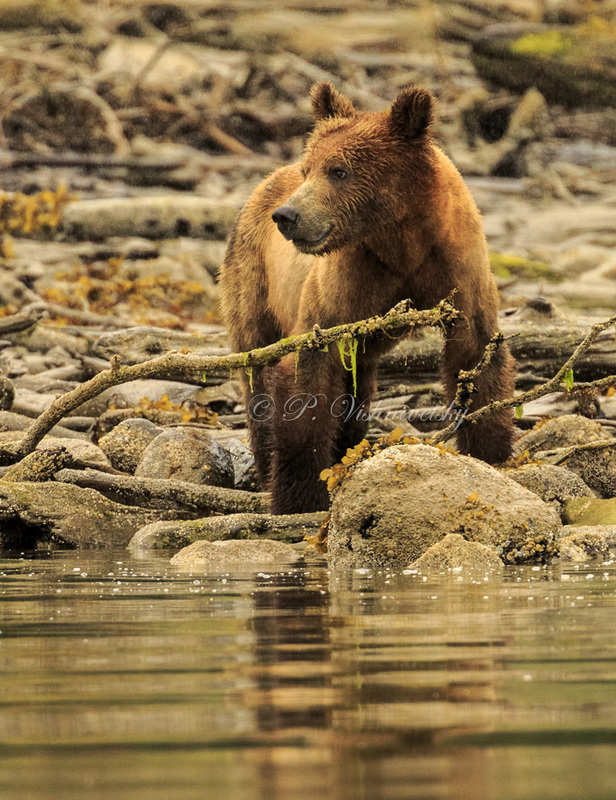
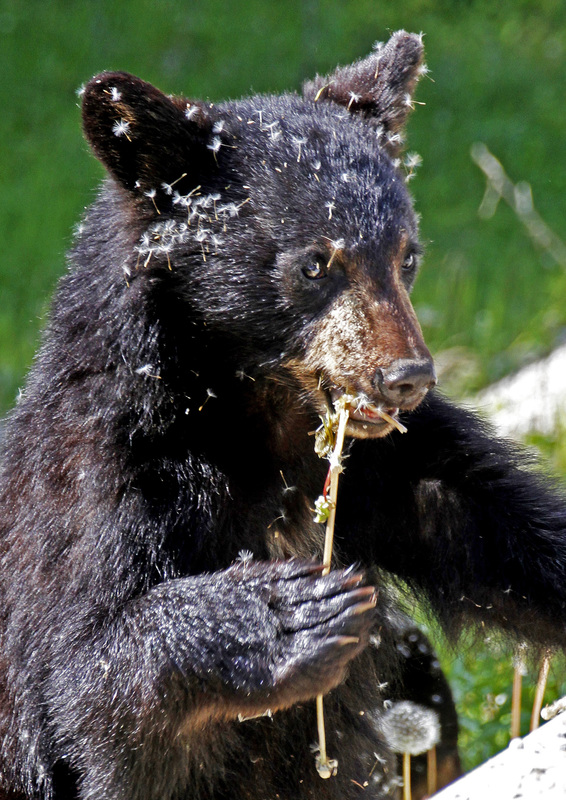
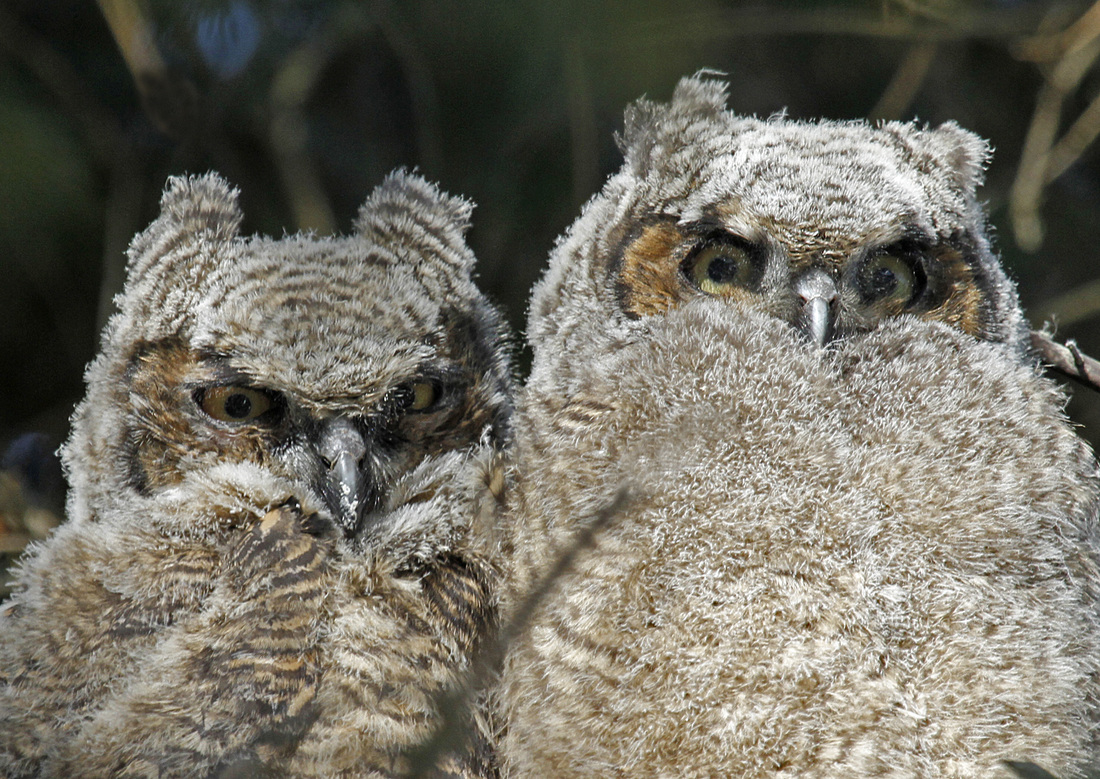
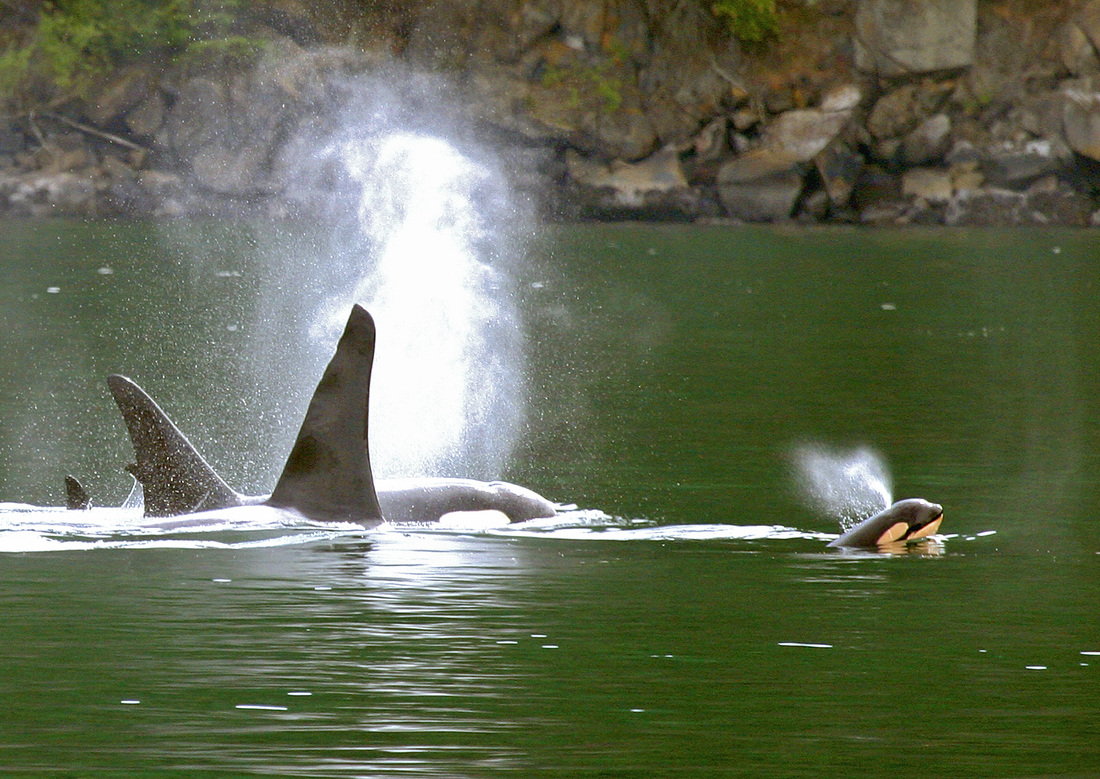
I never hefted a camera before about five years ago and had no clue how to operate a ‘real’ camera – too complicated. And I was working too – no time. So when I retired, had discretionary time, and the awesome digital camera became available, I started taking pictures. The digital camera provided a wonderful creative outlet, which had had to be push to the background during the working stage of my life. So now I truly enjoy myself – no apologies. And I don’t have to dress up in the corporate uniform to do it. For me the Pacific Northwest offers a spectacular parade of entrancing images – a never-ending kaleidoscope of shapes, textures, and colors to entertain and delight the senses. I find Nature in all forms – landscapes, seascapes, wildlife, birds, – to be perfectly beautiful just as She is without any artificial enhancements Through my photography I attempt to capture and render Nature as simply and as accurately as possible. Gwen's website 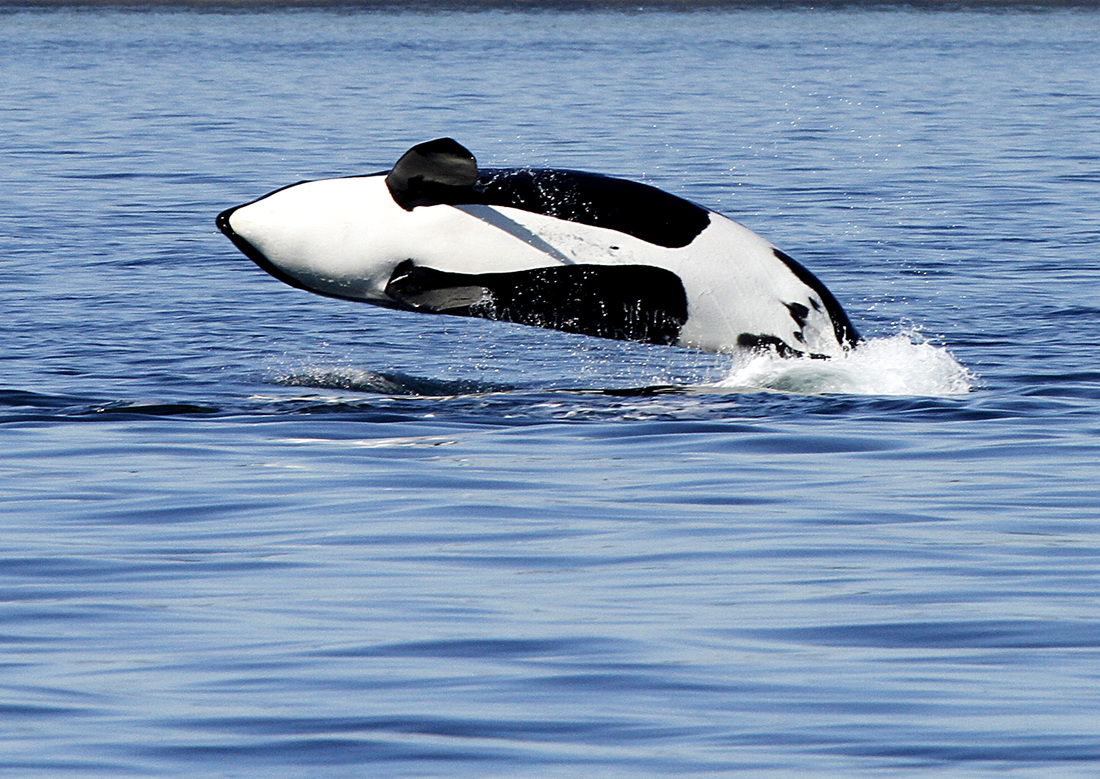 An Interview with wildlife photographer Lynn Karns Why wildlife? (why do you shoot mostly wildlife?) Shooting photographs of wildlife gives me the opportunity to observe and capture moments when wild animals are just being themselves. They are constantly moving and changing and that is challenging to me. I love trying to find humorous photos, close up or beautifully lit photos. What was your first wildlife photograph? I have shot photographs of wildlife for as long as I can remember. The first time I realized that I really loved shooting wildlife was when I found myself lined up with birders and photographers in Florida on Sanibel Island waiting for a flock of Roseate Spoonbills to fly in at dusk. I thought about my father who was a wildlife biologist and an active participant in the Audubon Society. For the first time in my life I understood his passion for wildlife. Your favorite wildlife subject? Location? Probably my two favorite subjects are water birds and whales. The common denominator is the water. Since being around water is my favorite environment, I am attracted to photograph wildlife there. I have so much respect for whales and their close family ties that I want to try to tell that story so that others can see how important they are to protect and preserve. Water birds and raptors are graceful, wary, and proud. I want to show those qualities when I photograph. Most dangerous shot? I feel strongly that one needs to respect wildlife and not place yourself or the animal in danger. That said, however, there was one time when I was a little nervous. Dave and I were traveling in Canada close to the Canadian Rockies when we pulled into a rest stop. The tourists hadn’t come yet so we were the only ones there. As we started to exit the car I spotted three bears just about 10 feet from us and I jumped back into the car. We watched them wander around for a few minutes and then I carefully opened the door and took a few shots. Dave stuck his head out the sun roof. They looked up and gazed at us for a few minutes and then kept on looking for dandelions. I knew how fast a mother bear could move so I stayed behind the protection of the door but my heart was racing because they were so close. Fortunately we all were fine but unfortunately the bears were in fairly dark shade so we were not excited about our pictures later. Luckiest photograph you captured? I believe the luckiest photograph I ever captured was five years ago on my birthday. Dave and I went out to Washington Park loop road and were just getting out of our car to take pictures when a gal drove by yelling, “Come down to Green Point; the whales are coming.” We recognized the girl from going out with Island Adventures so we believed her and jumped back into our car. We drove down to where we believed she was talking about and then set up our tripods and cameras. In the distance we could see them coming. I kept watching through my lens and I saw a whale come up out of the water. I pressed down on my shutter release taking multiple pictures as the whale breached. Later we are able to stitch the pictures together and show a complete breach. We later identified the whale as Princess Angeline. I believe it was a very lucky shot. A friend of ours who has lived in Anacortes his entire life said, “I can’t believe it. I have never seen the orcas off Green point in my life.” I called it God’s birthday gift to me. Most memorable? Probably my most memorable moment also happened in Canada on a different trip to the Canadian Rockies and it also involved bears. We were traveling through Kootenay National Park when we saw some bears off the side of the road. There were cars beside them so we got in line behind them. When it was our turn to drive up close to them, I was surprised how close they were AND how active they were. I was “almost” afraid to put the window down. We also had to keep an eye out for the local state trouper because they were not happy with the tourists stopping. We got some fabulous pictures of them in the dandelions. I was on a high for weeks afterward. Technique tip Remember that wildlife is out at dawn and at dusk. Don’t waste your time looking during the heat of the day unless you are in a zoo. However, a zoo is a very good place to practice shooting photographs of wildlife. You really can capture some very nice shots since you have a captive audience. Equipment tip I have a 100 to 400 lens, 4.5-5.6 lens which I call my wildlife lens. It is portable and easy to handle. I don’t need to worry about depth of field when I am shooting far away so the speed of the lens is good for me. Shooting digitally with a small sensor, a 400 lens is equivalent to a 600 so the length is good also. I am not tied to a tripod because I can handhold this lens also. I believe every wildlife photographer should have a good long lens but it should be easy to handle.  Lynn Karns Bio
I consider myself both a communicator and an artist. For most of my working life I was a English, journalism, and photography teacher in high school for 20 years and then at Grand Canyon University in Phoenix, Arizona for 10 years. My passion has been photography since I taught in Japan at a military base for two years, in 1969-71, bought a manual camera and spent as much time as possible traveling around the east attempting to photograph and tell a story at the same time. When I came back to the U.S., I took 18 hours of photography from Arizona State University and began incorporating photography into my teaching. I loved watching students “catch the bug” like I had. I retired in 2005 and moved with my husband to the Northwest where I love to travel and photograph the beautiful vistas and wildlife available to us. Website |
AuthorPhotography and photographers... A look at both. Blame it on the light. Archives
June 2017
Categories
All
|


 RSS Feed